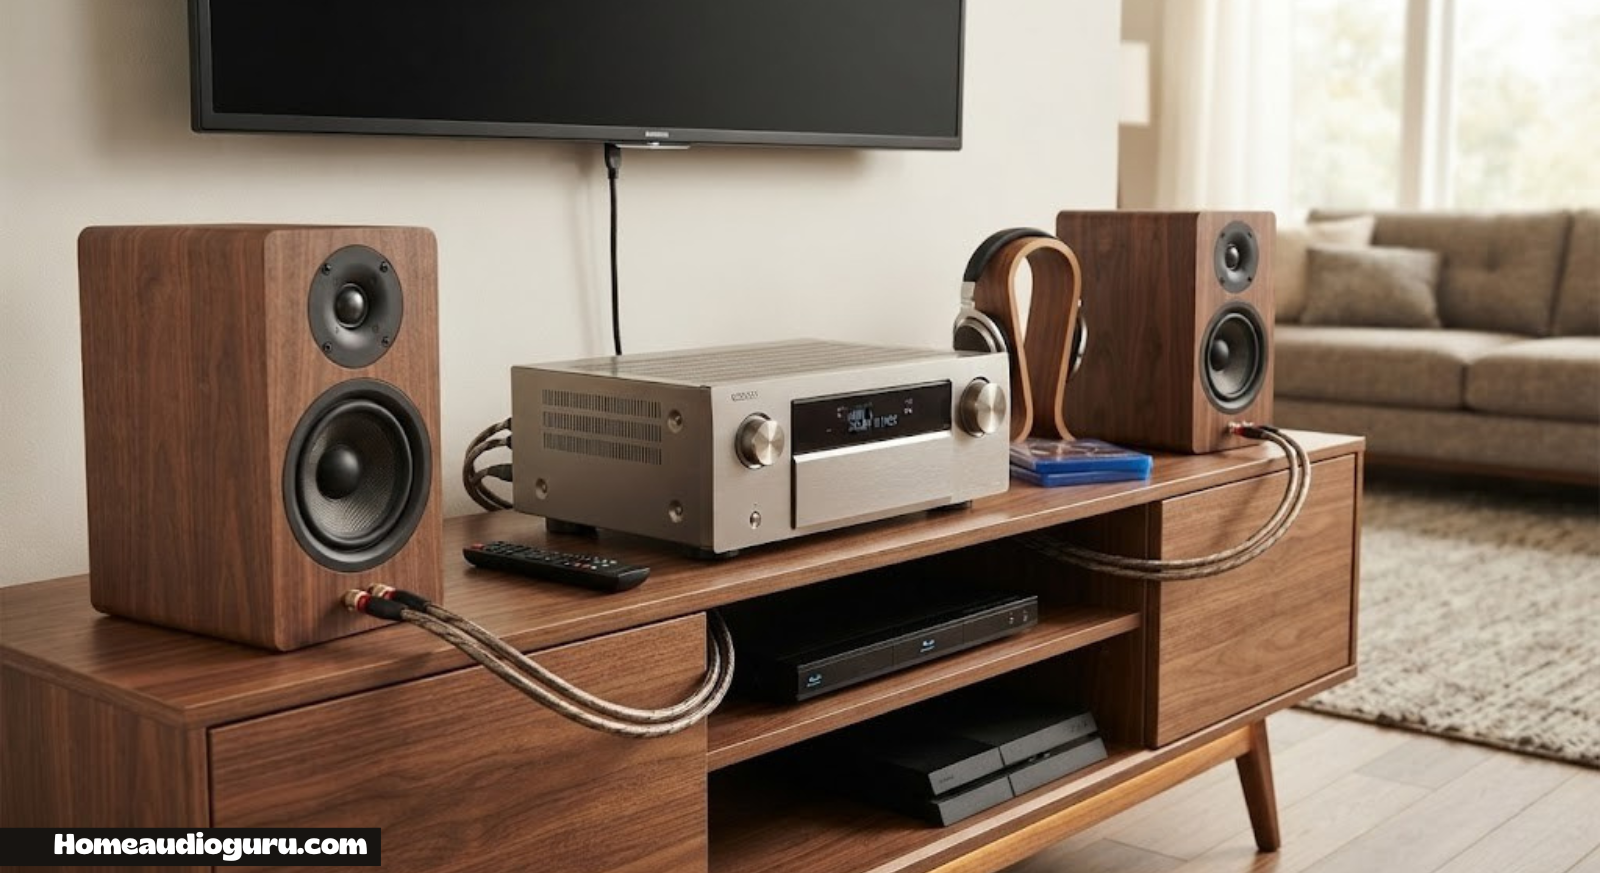
How to Calibrate Receiver Speakers: The Complete Step-by-Step Guide
Get theater-quality sound out of the system you already own. This guide walks through manual calibration, automatic room correction, distance and level tuning, and the mistakes that quietly wreck most home theater setups.
Why Speaker Calibration Matters
Most people buy a decent receiver, wire up a set of speakers, and press play the same night — and honestly, it sounds fine. Fine, though, is a long way from what the system is actually capable of. Calibration is the unglamorous step that turns a pile of correctly wired hardware into a system that sounds like it was designed for the room it’s sitting in, instead of some generic showroom.
Every speaker in your setup is a different distance from your ears, has a different sensitivity rating, and interacts differently with the walls and furniture around it. A center channel tucked into a TV stand behaves nothing like a bookshelf speaker sitting in open air. Without calibration, your receiver has no idea any of that is true — it just sends an identical signal to every channel and hopes for the best.
Done properly, calibration fixes three things at once: level matching so no channel overpowers another, distance compensation so sound from every speaker reaches your ears at the same time, and crossover tuning so bass gets routed to speakers that can actually handle it. Get those three right and dialogue snaps into focus, surround effects stop sounding vague, and the sub finally blends instead of booming.
There’s a useful analogy here: think of an uncalibrated system like a group of people reading the same script but each starting a fraction of a second apart and speaking at slightly different volumes. Individually, each voice might be clear, but together the effect is muddy and hard to follow. Calibration is simply the process of getting everyone to start on the same beat and speak at a matched volume, so the combined result is coherent instead of scattered.
If you’re still deciding on hardware before any of this becomes relevant, it’s worth reading through our guide to the best home audio receivers or comparing a receiver vs. soundbar setup first, since calibration steps differ a bit depending on the gear.
It’s also worth separating two ideas that get conflated a lot: buying better speakers and calibrating the ones you already own. Upgrading hardware absolutely helps, but it’s a much bigger investment for a smaller improvement than most people expect if the underlying calibration is still off — new speakers dropped into an uncalibrated system inherit the same timing and level problems the old ones had. A modest set of speakers, correctly calibrated, will consistently outperform a premium set that’s left on factory defaults. That’s not a marketing line — it’s simply how psychoacoustics works — your brain is extraordinarily good at detecting inconsistency, even when it can’t articulate exactly what’s inconsistent. Human hearing is extremely sensitive to timing and level differences between channels, even differences too small to consciously notice as “wrong.” You just perceive the end result as sound that feels muddled, directionless, or fatiguing after twenty minutes, without being able to say exactly why.
There’s also a practical, non-audiophile reason to care about this: convenience. A properly calibrated system means you stop reaching for the remote mid-movie to boost dialogue or turn down an overly aggressive surround effect. The volume knob becomes something you touch once at the start of a session, not something you’re constantly fighting. For anyone sharing a home theater with family members who have different hearing sensitivities, that consistency matters more than almost any hardware upgrade.
Finally, calibration is one of the only genuinely free upgrades left in this hobby. You don’t need to spend a dollar to redo it, and the entire process — done manually — usually takes somewhere between twenty and forty minutes once you’re familiar with your receiver’s menu layout. Compare that to the cost and effort of upgrading an amplifier or replacing speakers, and it’s easy to see why audio professionals treat calibration as step one, not an optional extra.
This guide walks through the whole process from both angles — the automatic route most people will use day to day, and the manual, menu-by-menu process underneath it — so that by the end, you’re not just clicking through a wizard and hoping for the best, but actually understand what each setting is doing and why it matters for the specific room your system lives in.

Want a head start on accuracy?
A basic SPL meter takes the guesswork out of level matching before you even open the receiver menu.
Check Price on AmazonWhat You Need Before You Start
Calibration doesn’t require a studio’s worth of gear, but a few basics make the process faster and far more accurate than eyeballing it.
- Your receiver’s remote — most calibration menus are remote-driven, not app-driven, even on modern receivers.
- A tape measure or laser distance tool — for manually entering speaker distances if you’re skipping auto-calibration.
- An SPL (sound pressure level) meter or a phone app — for matching channel volumes by ear-referenced measurement rather than guesswork.
- A quiet room — HVAC noise, fans, and even a running dishwasher can throw off automatic room correction microphones, since the sweep tones are measured against whatever ambient noise floor exists in the room at that moment.
- Your primary seating position marked — calibration is only meaningful relative to where you actually sit.
- A notepad or your phone’s notes app — jotting down each channel’s original distance and level before you start gives you a fallback if something goes wrong mid-process.
- Roughly 30–45 minutes of uninterrupted time — rushing through calibration, especially the automatic microphone sweep, is one of the most common reasons people end up redoing it a week later.
One thing worth doing before you even open the setup menu: walk your room and think about it the way sound actually behaves in it, not the way it looks. Hard surfaces like glass cabinets, bare walls, and hardwood floors reflect sound and can exaggerate certain frequencies. Soft surfaces like rugs, curtains, and upholstered furniture absorb it. Neither is inherently good or bad, but a room that’s almost entirely hard surfaces will benefit more from automatic room correction’s EQ smoothing than a room that’s already heavily furnished with soft materials. Knowing this ahead of time helps you interpret the calibration results instead of just trusting them blindly.
It’s also worth confirming your subwoofer’s own volume dial is set to a reasonable, repeatable position — around the halfway mark is a common starting point — before calibration begins. Automatic and manual calibration both adjust trim relative to whatever level the sub is already outputting; if that starting point is wildly high or low, you’ll end up compensating for it elsewhere in ways that don’t hold up once you inevitably reach for that dial again later.
If you haven’t finished the physical setup yet — running wire, placing the sub, connecting the display — it’s worth backing up to our guides on how to set up a home theater receiver and how to connect speakers to a receiver before touching any calibration menu. Calibrating a system with a miswired surround channel just locks in the mistake.
It also helps to know your channel layout going in. If terms like “5.1,” “7.1,” or “5.1.2” still feel murky, our breakdown of receiver channels explained covers exactly what each number represents before you start assigning speaker positions in the menu.
Step-by-Step Manual Calibration
Automatic room correction is convenient, but understanding the manual process matters even if you plan to let the receiver’s microphone do the heavy lifting — it’s what lets you sanity-check the automatic results afterward. Below is the full manual process, broken into six steps, each with a visual reference.
Step 1: Access the Speaker Setup Menu
Open your receiver’s on-screen menu, navigate to Audio or Speaker Setup, and select Manual Setup rather than the auto-calibration wizard. This gives you direct access to every parameter individually instead of letting the receiver decide for you.
Step 2: Set Speaker Size (Small/Large)
For each channel, choose “Small” unless you’re using large tower speakers with genuine deep-bass extension. “Small” simply tells the receiver to filter out bass below the crossover point and reroute it to the subwoofer — it has nothing to do with physical size.
Step 3: Configure Crossover Frequency
The crossover is the frequency at which bass duties hand off from your small speakers to the subwoofer. 80Hz is the standard default and works well for most bookshelf and satellite speakers. If your speakers are unusually small (tiny satellites), raise it to 100–120Hz so they aren’t asked to reproduce bass they can’t handle cleanly.
Step 4: Set Speaker Distances
Measure from the front baffle of each speaker to your primary seating position, and enter those values exactly. This adds tiny delays so sound from a nearby center channel and a farther surround speaker reach your ears at the same instant — critical for dialogue staying anchored to the screen.
Step 5: Adjust Channel Levels
Using the test tone function, play a tone through each speaker in turn and use an SPL meter (or a calibrated app) to bring every channel to the same reference level, typically 75dB. This is the single step most people skip, and it’s the one most responsible for a lopsided, front-heavy soundstage.
Step 6: Test and Fine-Tune with Test Tones
Run the test tone sequence a second time after saving your settings to confirm the changes actually took effect. Follow up with a real scene from a movie or a music track you know well — measurements get you close, but your ears make the final call on whether it sounds right. Give yourself permission to nudge a channel by half a decibel here or there if something still feels slightly off after the numbers say it’s correct; calibration tools get you into the right neighborhood, but the very last mile is always a judgment call.
For a broader picture of how these settings interact with amplifier power, it’s worth reviewing how many watts you actually need for a receiver — underpowered channels can mimic the symptoms of bad calibration even when every setting above is correct.
A few extra notes on getting each of these six steps right the first time. When measuring distances in Step 4, resist the urge to round to the nearest whole foot — most receivers accept distance entries in fractions of a foot or in centimeters, and that precision genuinely matters for how well the timing alignment works. A half-foot error on a nearby center channel is proportionally much larger, and therefore more audible, than the same error on a surround speaker eight feet further back.
When it comes to Step 5’s level matching, it’s worth running the test tone sequence twice: once to get a baseline reading on every channel, and a second time after you’ve made your first round of trim adjustments, just to confirm nothing shifted unexpectedly. Some receivers apply changes live as you adjust them, which is convenient, but it also means it’s easy to lose track of which channel you already fixed if you’re moving quickly.
Also worth remembering: crossover frequency in Step 3 isn’t a single global number on every receiver. Higher-end models let you set crossover independently per channel, which matters if your front speakers are larger towers while your surrounds are small satellites. In that case, it’s common — and correct — to leave the fronts at a lower crossover like 60Hz while keeping surrounds at 100Hz or higher.

Setting up a new system from scratch?
A capable mid-range receiver makes every calibration step below easier, with cleaner menus and better auto-EQ.
Shop Receivers on AmazonAutomatic Room Calibration Systems
Every major receiver brand now ships with some form of automatic room correction — a small microphone plugs into the front panel, the receiver plays a series of sweeping test tones from each speaker, and software analyzes the room’s reflections to set distance, level, and even basic EQ automatically.
These systems get you roughly 80–90% of the way to a well-tuned system in about ten minutes, which is exactly why they’re worth running even if you also plan to fine-tune manually afterward.
| System | Found On | Strengths | Known Limitations |
|---|---|---|---|
| Audyssey (MultEQ) | Denon, Marantz | Multi-point measurement, strong bass management | Can over-correct treble; manual tweak often recommended |
| YPAO | Yamaha | Fast, simple, good distance accuracy | EQ curve can sound slightly dark by default |
| MCACC | Onkyo, Pioneer | Detailed room analysis, good phase control | Interface feels dated; more steps than rivals |
| DTS Play-Fi / DTS:X built-ins | Various multi-brand | Good for streaming-first, multi-room setups | Fewer manual override options on entry models |
Regardless of which system your receiver uses, the underlying steps are the same: place the microphone at ear height in your primary seat (and often two to three additional positions), keep the room silent, and let the sweep tones run uninterrupted. Avoid running these tests with a ceiling fan on or pets moving around — both throw off the reading more than people expect.
After the automatic pass finishes, it’s still worth opening the manual menu and reviewing what the room correction chose for speaker size, crossover, and distance. Automatic systems occasionally misjudge a speaker’s size classification or set a distance a foot or two off, especially in rooms with heavy furniture or unusual speaker placement.
If you’re pairing your receiver with a broader multi-room setup, our guide on how to set up a home audio system covers how calibration fits into a whole-house configuration, not just a single home theater room.
One detail people frequently overlook: most automatic calibration systems ask you to measure from multiple positions around your primary seat, not just the exact center of the couch. Take that seriously rather than rushing through it. Averaging measurements across several nearby points helps the receiver build a correction curve that works well for a realistic seating area — a couple of people spread across a couch — rather than one that’s perfectly tuned for a single, exact head position and noticeably worse a foot to either side.
It’s also worth understanding what these systems are — and aren’t — correcting. Room correction EQ is primarily addressing bass response, since low frequencies are the most affected by room dimensions and standing waves. Midrange and treble correction is more limited and, on some systems, more likely to introduce an unnatural-sounding dip or peak than to genuinely fix a problem. That’s part of why manually reviewing the result matters: if a frequency response graph (many apps display one) shows a strange, narrow dip in the midrange, that’s worth manually flattening rather than trusting outright.
Calibrating Atmos and Height Channels
If your system includes height or ceiling-mounted speakers for Dolby Atmos, calibration gets a bit more nuanced. Height channels need their own distance and level settings, and because they’re firing downward or reflecting off the ceiling, small placement differences have an outsized effect on how convincing the overhead effect sounds.
- Distance matters more here, not less. Height speakers are often close to the listening position vertically, so even a one-foot measurement error is proportionally larger than the same error on a front speaker ten feet away.
- Keep height channel levels slightly conservative. Overhead effects that are too loud relative to the rest of the mix tend to sound artificial rather than immersive — a couple of dB lower than the automatic calibration suggests often sounds more natural.
- Re-run calibration after adding height speakers to an existing setup. Adding new channels changes the acoustic behavior of the whole room, not just the new speakers.
Height channel placement itself deserves a mention here too, even though it’s technically a step before calibration. In-ceiling speakers positioned directly above the listening position tend to produce the most convincing overhead effect, while up-firing modules that bounce sound off the ceiling from a front or rear position are more forgiving of exact placement but more dependent on ceiling height and material — a textured or very high ceiling scatters the reflection less predictably than a flat, standard-height one. If your overhead effects sound vague no matter how carefully you calibrate levels and distance, it’s worth revisiting placement itself before assuming the receiver’s settings are to blame.
It’s also worth pointing out that not every source material is mixed with equally aggressive height information. A film mixed with a genuinely immersive Atmos track will make a well-calibrated height setup obvious within the first few minutes, while a track with only sparse overhead cues can make an otherwise correctly calibrated system feel underwhelming simply because there’s not much happening up there to hear.
Common Calibration Mistakes to Avoid
Most disappointing home theater sound comes down to one of a handful of repeatable mistakes, not bad hardware.
Do This
- Measure distances from the seated ear position, not the wall
- Re-run calibration after moving any furniture or speaker
- Keep the room quiet during automatic calibration sweeps
- Double-check crossover settings against your speakers’ actual bass extension
Avoid This
- Setting all speakers to “Large” out of habit
- Skipping the manual review after auto-calibration finishes
- Placing the calibration mic on a couch cushion instead of a stand at ear height
- Leaving a subwoofer’s own volume knob at a random level and calibrating around it
Beyond the list above, there’s a subtler mistake worth calling out: treating calibration as a one-and-done event rather than a baseline you occasionally sanity-check. Rooms are not static. Seasonal humidity changes affect how surfaces reflect sound, houseplants grow and start absorbing more midrange than they did in spring, and even something as simple as swapping a hardwood coffee table for an upholstered ottoman shifts the acoustic profile of a room measurably. None of these changes require a full recalibration on their own, but if something starts sounding subtly different after a season change, it’s worth running the test tone sequence again before assuming a speaker has failed.
Another easy trap is over-trusting a single test tone pass. Test tones are useful for level matching, but they’re a poor substitute for listening to actual content. A channel can measure correctly on a tone and still sound wrong on a real movie mix, because tones don’t reveal issues like phase cancellation between two speakers or a boundary reinforcement problem with the subwoofer. Always close out calibration with real content, not just numbers on a meter.
A good real-content test playlist covers a few different scenarios on purpose: a dialogue-heavy scene to check center channel clarity, an action sequence with fast pans to check how convincingly sound moves between speakers, a quiet, dynamic music track to check whether channel balance holds up at low volume, and — if your system includes a subwoofer — a bass-heavy track to check for boominess or one-note bass that suggests a room mode problem rather than a level problem. Running through all four in sequence takes maybe ten minutes and catches nearly everything a test tone alone would miss.
Tools That Make Calibration Easier
You don’t need professional gear, but a few inexpensive tools remove a lot of the guesswork.
- SPL meter: A simple handheld or phone-based sound pressure meter lets you verify — rather than assume — that channel levels actually match.
- Laser distance measurer: Faster and more accurate than a tape measure for awkward speaker placements, like in-wall or ceiling-mounted units.
- Calibration disc or tone generator app: Useful for a secondary, receiver-independent check of your levels.
- Tripod or mic stand: Keeps the automatic calibration microphone at a consistent, correct ear-height position instead of balanced on a cushion.
- Smartphone SPL meter app: A reasonable free substitute for a dedicated meter, though built-in phone microphones aren’t perfectly flat across all frequencies, so treat readings as close-enough rather than lab-accurate.
- A small notebook or spreadsheet: Logging your final distance, level, and crossover settings per channel makes it trivial to spot-check or restore your configuration later, especially useful if you ever factory-reset the receiver or swap it out entirely.
None of these tools are strictly mandatory — plenty of people get a perfectly good result using just the receiver’s built-in test tones and their own ears. But each one removes a specific source of human error: the SPL meter removes guesswork from level matching, the laser measurer removes tape-measure inaccuracy on odd angles, and the mic stand removes the single most common automatic-calibration mistake, which is an inconsistent or incorrect microphone height during the sweep.

Precision beats guesswork
A basic laser distance tool takes seconds per speaker and removes tape-measure error entirely.
View on AmazonTroubleshooting After Calibration
If something still sounds off after a full calibration pass, the issue is almost always one of these:
| Symptom | Likely Cause | Fix |
|---|---|---|
| Dialogue sounds quiet or muffled | Center channel level set too low, or crossover too high | Raise center trim by 1–2dB; lower crossover to 80Hz |
| Bass feels boomy in one spot | Subwoofer placed at a room resonance point | Try the “subwoofer crawl” — test positions before recalibrating |
| Surround effects feel disconnected | Incorrect surround distance measurement | Re-measure from seated ear height, not floor level |
| Overall sound feels flat or lifeless | Auto-EQ over-correcting treble | Toggle the room correction curve (Flat vs. Reference) if available |
| One channel silent during test tones | Wiring or connection issue | Recheck speaker wire polarity and receiver terminal seating |
If a channel drops out entirely rather than just sounding off, it’s worth revisiting your original wiring against our guide on how to connect speakers to a receiver before assuming it’s a calibration issue at all.
A less obvious troubleshooting case worth mentioning: if the whole system sounds noticeably quieter after calibration than it did before, check whether a volume limiter or reference level offset got applied during the automatic sweep. Several receivers set a maximum volume ceiling based on the loudest test tone measurement, intended to protect speakers from being driven past a safe level during especially loud content. That’s a sensible safety feature, but it can catch people off guard if they’re used to pushing the volume higher than the new calibrated ceiling allows. This setting is almost always adjustable separately from the core calibration result.
Also worth checking if bass feels inconsistent between different subwoofer positions you’ve tried: room modes (resonant frequencies tied to a room’s dimensions) can make a subwoofer sound powerful in one spot and weak just a few feet away, entirely independent of receiver settings. This is a placement issue, not a calibration issue, and no amount of trim or crossover adjustment fully resolves a sub sitting in a bad spot relative to the room’s dimensions.
One more edge case worth flagging: if you’ve recently updated your receiver’s firmware, it’s not unusual for saved calibration profiles to reset or shift slightly, since firmware updates occasionally touch the underlying audio processing engine. If a system that sounded correct yesterday suddenly sounds off right after an update, checking the calibration settings should be one of the first troubleshooting steps, before assuming a speaker or cable has failed.
Brand-Specific Calibration Notes
The core process is universal, but a few brand quirks are worth knowing going in.
- Denon and Marantz (both use Audyssey): Look for the “Audyssey Dynamic EQ” and “Dynamic Volume” toggles after calibration — these affect how the system behaves at low volumes and can make a calibrated system sound different depending on time of day. See our picks for the best Denon receivers and best Marantz receivers.
- Yamaha (YPAO): Offers a “Natural” vs. “Flat” target curve after calibration — most rooms sound better on Natural, but it’s worth A/B testing both. Check our best Yamaha receiver roundup for model-specific menu differences.
- Sony: Calibration menus are simpler and offer fewer manual override points, so it’s especially important to manually verify distances afterward. See our best Sony receiver guide.
- Onkyo (MCACC): Supports multi-point measurement for more precise average room correction, though the process takes noticeably longer. Our best Onkyo receiver guide has more on which models include the more advanced MCACC Pro version.
Across every brand, one theme repeats: the automatic calibration wizard almost always includes a way to toggle between a “flat” reference curve and a brand-tuned house curve after the sweep finishes. It’s worth trying both on a familiar piece of content rather than assuming the default is the best fit for your ears and your room. Reference curves are calibrated to a mixing-studio standard, which is technically accurate but can sound thin or bright in a living room with different acoustics and ambient noise than a professional studio. House curves, on the other hand, are tuned by each manufacturer’s engineers to sound pleasant in typical home environments, sometimes at a slight cost to strict accuracy.
If you’re comparing receivers before a purchase rather than tuning one you already own, it’s worth noting that calibration quality does vary meaningfully between entry-level and mid-range models within the same brand, even when they share the same underlying room correction technology. Entry-level receivers often limit you to single-point measurement or a simplified menu with fewer manual overrides, while mid-range and above models typically support multi-point measurement and finer manual control after the fact.
It’s also worth knowing that some manufacturers gate their more advanced room correction tiers behind specific model numbers within the same product line rather than the same feature being available across the whole lineup. A base Audyssey implementation and the higher “MultEQ XT32” tier, for example, differ meaningfully in filter resolution and how many measurement points they support — a detail easy to miss when comparing spec sheets that just say “Audyssey” without the suffix.
How Often Should You Recalibrate
Calibration isn’t permanent — it’s a snapshot of your room at the moment you ran it. Recalibrate whenever any of the following happen:
- You move a speaker, even by a foot or two
- You rearrange furniture, add a rug, or change curtains (these all change room acoustics)
- You add or remove a speaker, including a new subwoofer or height channel
- You change your primary seating position
- You swap out the receiver itself
- You notice yourself repeatedly reaching for the volume or trim controls mid-session — that’s usually a sign something has drifted since the last calibration
Outside of those triggers, an annual recalibration is a reasonable habit even if nothing obvious has changed — rooms shift subtly over time in ways that are hard to notice day to day but do show up in a fresh measurement.
It’s also reasonable to recalibrate seasonally in climates with significant humidity swings, since air density genuinely does affect how sound travels and how surfaces reflect it, though this effect is smaller and slower-moving than the impact of furniture or speaker placement changes, so treat it as a secondary factor rather than the first thing to check when something sounds off. If you notice your system sounding slightly different between summer and winter without any physical changes to the room, this is a plausible explanation worth ten minutes of test-tone verification before you start troubleshooting hardware.
A practical habit worth adopting: keep a simple written log — even just a note on your phone — of your calibration settings and the date you last ran them. That way, if something suddenly sounds off, you have a quick reference to compare against rather than trying to remember what “normal” used to sound like.
Final Checklist Before You Finish
- All channels tested and confirmed active with no silent speakers
- Speaker sizes set correctly (Small for most, Large only for full-range towers)
- Crossover set appropriately for your smallest connected speaker
- Distances measured to the seated ear position, not the wall or floor
- Channel levels matched using an SPL meter or reliable app
- Height/Atmos channels calibrated separately if present
- Real-content listening test completed after saving settings
Frequently Asked Questions
Do I need an external microphone to calibrate my receiver?
Most modern receivers include a small calibration microphone in the box specifically for automatic room correction. If you’re calibrating manually instead, you don’t need a mic at all — just an SPL meter or app for level matching.
Should I set my speakers to “Large” if they’re physically big?
Not necessarily. “Large” and “Small” in a receiver menu refer to bass extension, not physical size. Even large-looking bookshelf speakers are usually best set to “Small” so deep bass gets routed to a dedicated subwoofer that handles it more cleanly.
What crossover frequency should I use if I’m not sure?
80Hz is a safe, standard default that works well for the vast majority of bookshelf, satellite, and in-wall speakers paired with a subwoofer.
Why does my center channel sound quieter than the front speakers?
This is almost always a level-matching issue rather than a hardware problem. Re-run the test tone sequence and check whether the center trim needs a small boost, especially if it’s a different speaker model than your front pair.
Is automatic calibration accurate enough on its own?
It gets most systems very close, but it’s still worth manually reviewing the distances and levels it selects. Automatic systems occasionally misjudge distance in rooms with unusual furniture layouts or heavy curtains.
How do I know if my subwoofer crossover is set correctly?
Play a mix of music with both vocals and bass. If bass sounds like it’s coming from a single, localized point rather than blending into the room, the crossover may be set too high — try lowering it toward 80Hz.
Can I calibrate a soundbar the same way as a full receiver system?
Soundbars typically use simplified, largely automatic calibration with far fewer manual controls. If you’re deciding between the two setups, our receiver vs. soundbar comparison covers how the calibration experience differs.
Does calibration improve music listening, or is it just for movies?
Both. Accurate distances and levels benefit stereo music playback just as much as multichannel movie mixes — a properly calibrated system tends to reveal detail and imaging that a default configuration masks.
What’s the “subwoofer crawl” method mentioned in the troubleshooting table?
It’s a placement technique where you temporarily put the subwoofer at your listening position, then crawl around the room at floor level to find the spot where the bass sounds smoothest — that spot is usually a strong location for the sub itself.
Do wireless speakers need the same calibration process?
The core principles apply, but the process depends heavily on the specific system’s app or interface. Our guide on whether wireless speakers lose quality covers some of the added variables involved.
Why does calibration matter more for Dolby Atmos systems?
Height and overhead channels are more sensitive to placement and distance error because of their proximity and angle to the listener. Small mistakes there are more noticeable than the same error on a front speaker several feet further away.
Will calibration fix a receiver that’s underpowered for my speakers?
No — calibration balances levels and timing, but it can’t create headroom the amplifier doesn’t have. If you’re maxing out volume and still hearing strain or distortion, that’s a power issue worth checking against our guide on how many watts you need for a receiver.
Final Thoughts
Speaker calibration is one of the few upgrades in home theater that costs nothing but time and genuinely changes how a system sounds. Whether you rely on your receiver’s automatic room correction, work through the manual steps above, or combine both, the payoff is the same: dialogue that’s easier to follow, surround effects that feel connected rather than random, and bass that blends instead of overwhelming everything else.
If calibration reveals that your current receiver’s menu options feel limiting, or that a channel simply doesn’t have the headroom to hit reference levels cleanly, it may be worth browsing our current picks for the best home audio receivers to see what a step up looks like.
And if you’re rebuilding a system from the ground up rather than fine-tuning an existing one, it’s worth stepping back and comparing a few complete package options before you get to the calibration stage at all — our roundups of the best home stereo systems under $500 and the best home theater systems under $10,000 both cover setups across a range of budgets, so you can pick hardware that’s actually worth the time this guide asks you to spend on it.
Either way, the underlying lesson holds regardless of budget: the difference between an average-sounding home theater and a genuinely great one usually isn’t the price tag on the components — it’s whether anyone ever sat down and told the system exactly where it was, and how it should behave in that specific room.

Ready to fine-tune your system?
Grab an SPL meter, block out twenty quiet minutes, and work through the calibration steps above from start to finish.
Shop Calibration Tools