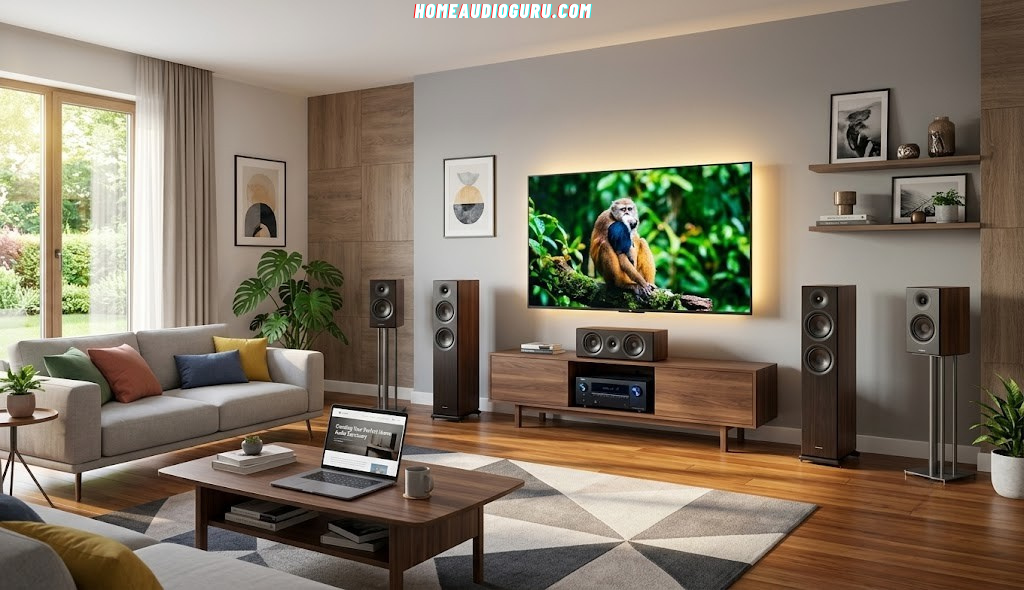
How to Set Up a Home Audio System: The Complete Step-by-Step Guide
Setting up a home audio system can feel intimidating the first time you unbox a receiver, a pair of towers, and a tangle of speaker wire. But the process is really just a series of small, logical decisions repeated in the right order: understand your room, pick the right gear for that room, place the speakers correctly, wire everything cleanly, and then calibrate. Skip a step and you’ll spend months chasing a sound that never quite locks in. Follow the sequence below and you’ll get a system that sounds balanced, powerful, and genuinely enjoyable from the very first movie night or listening session.
This guide walks through every stage of the setup process, from room assessment through long-term maintenance, with visual diagrams for the hands-on steps. If you’re still shopping for gear, our best home audio systems roundup is a good place to start before you dive into installation.
Whether you’re setting up a modest soundbar in a rental apartment or wiring a full Dolby Atmos theater room from scratch, the underlying principles stay remarkably consistent. Sound behaves according to the same physical rules regardless of price point, which means a careful, methodical approach pays off at every budget level. A twelve-hundred-dollar system set up thoughtfully, with attention to placement and calibration, will frequently outperform a much pricier system that was simply unboxed and left in whatever position looked convenient.
It’s also worth setting expectations before you begin: a home audio system doesn’t need to be perfect to be genuinely excellent. Professional acousticians spend careers chasing diminishing returns in treated studio environments, but a typical living room, set up using the methods in this guide, can sound remarkably close to reference quality for the price of admission. Small imperfections in an untreated living room are normal and rarely noticeable once the major fundamentals — placement, wiring, and calibration — are handled correctly.
Understand Your Room and Listening Space
Every home audio setup starts in the same place, and it isn’t the electronics store — it’s your living room. Room dimensions, wall materials, flooring, window placement, and even the furniture you already own all shape how sound behaves before a single speaker is plugged in. A system that sounds phenomenal in a carpeted, curtain-lined den can sound harsh and boomy in an open-concept space with hardwood floors and a wall of glass, even with identical gear.
Start by measuring the room’s length, width, and ceiling height, and sketch a rough floor plan noting where the television or projector screen will sit, where seating is fixed, and where doorways or hallways interrupt the walls. Hard, reflective surfaces like tile, glass, and bare drywall bounce high frequencies aggressively, which can make a system sound bright or fatiguing. Soft surfaces — rugs, upholstered furniture, curtains, and bookshelves — absorb and diffuse sound, generally producing a warmer, more relaxed listening character.
Pay close attention to symmetry. A room where the main seating position sits exactly between two side walls at equal distances will almost always image better than a lopsided space where one speaker is close to a wall and the other is out in the open. If your room is asymmetric, don’t worry; it just means room correction (covered in Step 8) will matter more for your setup.
Also consider the room’s primary use. A dedicated media room built for movies benefits from a full surround or Dolby Atmos layout with dedicated height channels. A multi-purpose living room that also needs to look tidy for guests might steer you toward a soundbar-based system or in-wall speakers that stay visually unobtrusive. Being honest about how the room is actually used prevents you from over-building — or under-building — your system.
| Room Feature | Acoustic Effect | What To Do |
|---|---|---|
| Hardwood or tile floor | Bright, reflective sound, more echo | Add a rug, especially between speakers and seating |
| Large windows / glass | Reflects high frequencies, can sound harsh | Use thick curtains during listening sessions |
| Open floor plan | Bass can feel thin, sound “escapes” the space | Consider a slightly larger subwoofer or a second sub |
| Small, boxy room | Bass buildup, standing waves, boomy low end | Corner-load carefully and rely on room correction |
| Asymmetric seating | Uneven stereo image between left and right | Use automatic level and delay calibration |
Once you have a clear mental map of your room’s strengths and quirks, you’re ready to decide what kind of system actually fits it — which is exactly what the next step covers.
Mapping Sound Paths Before You Buy Anything
It’s worth walking your room again with a slightly different question in mind: where will sound actually travel once speakers are installed? Stand at your intended seating position and look toward each spot where a speaker might go. Note anything directly between that spot and your ears — a doorway, a bookshelf, a support pillar — because obstructions like these can create early reflections or outright block direct sound, softening detail even from an otherwise excellent speaker.
Ceiling height matters more than most people expect, too. Standard eight-foot ceilings behave differently from vaulted or open-plan ceilings that extend into a second story. Taller or irregular ceilings tend to scatter sound more unpredictably, which is one reason rooms with cathedral ceilings often benefit from slightly more aggressive room correction and, in some cases, additional surround or height speakers to fill in gaps that a simple stereo pair can’t reach on its own.
Take note of HVAC vents, ceiling fans, and any other sources of background noise near your planned listening area as well. A quiet-sounding room during the day can turn noisy the moment central air kicks on, and that ambient noise floor sets a practical lower limit on how much subtlety and dynamic range you’ll actually be able to hear, regardless of how good your equipment is.
Working With — Not Against — Your Existing Furniture
Very few people are willing to rebuild an entire living room around a stereo pair, and the good news is that you rarely need to. Bookshelves, upholstered sofas, and area rugs are genuinely useful acoustic tools when positioned thoughtfully. A bookshelf packed unevenly with books of different sizes, for example, acts as a natural diffuser, scattering reflected sound rather than bouncing it back as a single, focused echo the way a bare wall would.
If your seating area backs directly onto a hard wall, a heavy curtain, a tapestry, or even a large piece of framed art with some depth behind the glass can noticeably soften harsh reflections without turning the room into a recording studio. The goal at this stage isn’t perfection — it’s simply understanding which of these adjustments are already available to you before you spend money on new hardware to compensate for a fixable room issue.
Renters and Temporary Spaces
If you’re setting up in a rental where drilling, mounting, and wall modifications are limited or prohibited, plan around freestanding stands, adhesive-backed cable channels, and furniture-based placement rather than in-wall or in-ceiling installation from the outset. Many of the same acoustic principles still apply — a well-placed stand-mounted speaker pair and a thoughtfully positioned subwoofer can sound excellent without a single hole drilled into a wall. Documenting your original speaker positions with a quick photo or a simple diagram also makes it far easier to restore your exact setup after a move, rather than starting the placement process over from scratch in a new space.
Choose the Right Type of System
“Home audio system” covers a wide spectrum of gear, from a single soundbar under the TV to a full 7.2.4 Dolby Atmos setup with a dedicated AV receiver. The right choice depends on your room, your budget, and how much complexity you’re willing to manage. Broadly, most households land on one of four approaches.
Soundbar Systems
A soundbar is the simplest path to noticeably better sound than built-in TV speakers. Modern soundbars often include a wireless subwoofer and sometimes small rear satellite speakers for a pseudo-surround effect. They’re compact, require minimal wiring, and many now support Dolby Atmos through upward-firing drivers that bounce sound off the ceiling.
AV Receiver + Discrete Speakers
This is the traditional home theater approach: a central receiver powers and processes audio for five, seven, or more individual speakers plus a subwoofer. It offers the most accurate, immersive sound and the greatest long-term flexibility, but it also requires the most planning, wiring, and calibration work.
Wireless Multi-Room Speakers
Platforms built around wireless speakers let you place standalone units in multiple rooms, streaming synchronized or independent audio to each. These systems prioritize convenience and whole-home coverage over outright home-theater immersion, and setup is largely handled through a smartphone app rather than a receiver menu.
Two-Channel Stereo Systems
For listeners who prioritize music over movies, a dedicated stereo pair driven by an integrated amplifier or powered speakers remains one of the purest ways to hear recorded music, without the added complexity of surround channels.
Powered Versus Passive Speakers
One more distinction worth understanding early is the difference between powered (active) and passive speakers. Passive speakers require an external amplifier or receiver to drive them and are the standard choice for AVR-based home theaters, since a receiver’s built-in amplification handles every channel from a single unit. Powered speakers include their own built-in amplifier and only need a line-level source connection, which simplifies wiring considerably and is common in dedicated stereo systems, desktop setups, and many wireless multi-room speakers.
Neither approach is objectively superior — the right choice depends on how much flexibility you want. Passive speakers paired with a separate receiver or amplifier let you upgrade components independently over time; if you outgrow your receiver’s power output, you replace only the receiver, not the speakers themselves. Powered speakers trade that modularity for simplicity, arriving as a more complete, plug-and-play package that’s harder to expand into a full surround configuration later.
| System Type | Best For | Setup Complexity | Typical Room Fit |
|---|---|---|---|
| Soundbar | TV dialogue clarity, movies, casual viewing | Low | Any living room |
| AVR + Discrete Speakers | Immersive home theater, Atmos | High | Dedicated media room |
| Wireless Multi-Room | Whole-home music, convenience | Low–Medium | Multiple rooms/zones |
| Two-Channel Stereo | Music-first listening | Medium | Den, office, listening room |
When an AV Receiver Setup Makes Sense
- You want true discrete surround or Atmos channels
- You have a dedicated media room
- You plan to expand the system over time
- You want the most accurate room correction options
When to Consider a Simpler System Instead
- Your room doubles as a shared living space
- You want minimal visible wiring
- You’re prioritizing music streaming over movies
- You want the system running in under an hour
If you’re comparing specific products at this stage, it’s worth checking full reviews before buying. Our best home theater system under $10,000 guide covers premium AVR-based builds, while the best home stereo system under $500 guide is a great starting point for a more budget-conscious, music-focused setup.
Budgeting Realistically Across System Types
Cost expectations vary enormously between these four approaches, and it helps to think in tiers rather than a single number. Entry-level soundbars start remarkably affordably and already outperform built-in TV speakers by a wide margin. A capable AVR-based 5.1 system with reasonable bookshelf speakers sits in a noticeably higher tier once you account for the receiver, five speakers, a subwoofer, and cabling. Stepping up to a full Atmos configuration with height channels or in-ceiling speakers adds further cost, both in hardware and in the additional wiring labor if you’re running speaker wire through walls or ceilings.
A practical approach many first-time buyers use is to budget the majority of their spend toward the front three channels — left, right, and center — since those carry the overwhelming majority of both dialogue and music content. Surrounds, height speakers, and even the subwoofer can often be modest, budget-tier models initially, then upgraded individually over time as your ears and your budget allow.
Matching System Type to Household Habits
Beyond the room itself, think honestly about who uses the space and how. A household that watches a lot of prestige TV dialogue-heavy dramas will benefit disproportionately from center-channel clarity, which points toward at minimum a 3.1 or 5.1 AVR setup rather than a stereo-only stereo pair. A household centered around weekend movie nights with a rotating cast of guests may prioritize a soundbar’s simplicity and forgiving auto-calibration over a more finicky, higher-ceiling AVR setup that needs more careful tuning to sound its best.
If the room in question is shared with young children or pets, factor in physical safety and durability as well — floor-standing towers and exposed subwoofer ports can be tempting targets for curious toddlers, and in-wall or on-stand speaker mounting hardware becomes a genuinely practical safety consideration, not just an aesthetic one.
How Much Time Should You Budget for Setup?
Time investment scales fairly predictably with system complexity. A soundbar with a wireless subwoofer can typically be unboxed, connected, and calibrated within thirty minutes to an hour, most of which is simply running the initial automatic room calibration if the soundbar includes one. A basic 5.1 AVR-based system with pre-existing speaker placement in mind — no wall drilling required — usually takes a half day to a full day for a first-timer, factoring in unboxing, wiring, placement adjustments, and calibration. A full 7.1.4 Atmos system with in-wall or in-ceiling wiring is a considerably larger project, often spanning a full weekend or requiring professional installation help for the wiring portion, particularly if walls or ceilings need to be opened and patched.
Setting realistic time expectations upfront, rather than assuming any home theater setup is a quick one-hour task, prevents the frustration of rushing through placement and calibration steps that genuinely benefit from unhurried attention.

Not Sure Which Receiver to Buy?
Check current prices and specs on a top-rated AV receiver that fits most home theater setups.
Check Price on AmazonSelect Speakers and Learn Placement Basics
Once you’ve settled on a system type, the next decision is which speakers to build around, and how many channels you actually need. It helps to think in terms of roles rather than just specs: every speaker in a home theater layout has a specific job.
- Center channel — carries the bulk of dialogue and should be prioritized for clarity.
- Front left/right — handle music, effects, and the majority of stereo detail.
- Surround left/right — provide ambient effects and envelopment.
- Height/Atmos speakers — add overhead effects for object-based audio formats.
- Subwoofer — reproduces low bass that main speakers typically cannot handle on their own.
A common starting configuration is 5.1: a center channel, two front speakers, two surround speakers, and a subwoofer. Stepping up to 7.1 adds a second pair of surrounds (often placed to the rear), while formats like 5.1.2 or 7.1.4 add two or four height channels for Dolby Atmos and DTS:X overhead effects.
Match speaker sensitivity and impedance to your amplifier’s capabilities — most home speakers sit between 4 and 8 ohms, and pairing dramatically mismatched sensitivities between channels can create an unbalanced soundstage even after calibration. Bookshelf speakers are a versatile, space-friendly choice for front, center, and surround duties, while floor-standing towers add more natural bass extension for the front channels without necessarily needing a subwoofer for music listening.
| Channel Count | Speakers Needed | Best Use Case |
|---|---|---|
| 3.1 | Center, L/R front, subwoofer | Compact rooms, dialogue-first setups |
| 5.1 | Center, L/R front, L/R surround, subwoofer | Most common home theater baseline |
| 7.1 | 5.1 plus L/R rear surrounds | Larger rooms, deeper envelopment |
| 5.1.2 / 7.1.4 | Above plus 2 or 4 height speakers | Dolby Atmos / DTS:X dedicated rooms |
If your household leans toward compact, design-forward speakers or a soundbar-first approach, our Polk MagniFi Mini review and Samsung B Series soundbar review both cover strong options that keep the footprint small without sacrificing much performance.
Bookshelf Versus Floor-Standing: A Practical Comparison
Choosing between bookshelf and floor-standing speakers for your front channels often comes down to room size and how much low-frequency extension you want from the main speakers themselves, independent of a subwoofer. Bookshelf speakers are compact, easier to position precisely, and generally more affordable per pair, making them a natural fit for surround duty regardless of what you choose for the front channels. Floor-standing towers, by contrast, typically house larger woofers and more internal volume, extending bass response further before a subwoofer needs to take over, which some listeners prefer for music-heavy use even within an otherwise movie-focused system.
| Factor | Bookshelf Speakers | Floor-Standing Speakers |
|---|---|---|
| Footprint | Small, needs stand or shelf | Larger, stands on its own |
| Bass extension | Limited, relies on subwoofer | Deeper, may need less sub support |
| Placement flexibility | High — easy to angle and reposition | Lower — heavier, less to move |
| Typical cost per pair | Lower | Higher |
| Best role | Surrounds, center, budget fronts | Front L/R in music-focused rooms |
Reading Speaker Specs Without Getting Overwhelmed
Speaker spec sheets can be intimidating, but a handful of numbers matter far more than the rest for typical home use. Sensitivity, usually listed in decibels, tells you roughly how loud a speaker plays for a given amount of amplifier power — a higher sensitivity rating means the speaker will play louder with less power, which matters more if you’re pairing with a lower-powered amplifier. Impedance, measured in ohms, needs to be compatible with your amplifier’s rated output; most home receivers handle 6 to 8-ohm speakers comfortably, while 4-ohm speakers draw more current and should be checked against your specific receiver’s specifications.
Frequency response range gives a rough sense of how deep the bass and how extended the treble will reach, though these numbers are measured differently by different manufacturers and shouldn’t be compared too literally across brands. Rather than chasing spec sheets alone, cross-reference with independent reviews and, whenever feasible, listen to speakers in person or borrow a return-friendly pair before committing to a full set for every channel.
Deciding Whether Atmos Height Channels Are Worth It
Dolby Atmos and DTS:X height channels add a genuinely noticeable dimension to well-mixed movie soundtracks — rain, aircraft, and ambient environmental sound moving overhead rather than staying locked to the horizontal plane. Whether this is worth the added expense and installation complexity depends heavily on how much of your content takes advantage of it and how much you personally value the effect. Action-heavy blockbusters and many recent streaming originals are frequently mixed in object-based audio formats, while older films and most television broadcasts are not, meaning the overhead channels sit unused for a meaningful portion of typical viewing.
Upward-firing modules that bounce sound off the ceiling from speaker-top placement offer a lower-commitment way to sample the format before investing in true in-ceiling speakers, which require more installation work but generally deliver a more precise, controlled overhead effect since the sound arrives from a fixed, purpose-built location rather than depending on ceiling material and height for reflection quality.
Planning for Expansion From Day One
Even if you start with a modest 3.1 or 5.1 setup, choosing a receiver with enough amplifier channels and pre-amp outputs to support your eventual target configuration avoids a full receiver replacement later. Most mid-range and higher AV receivers include at least seven channels of amplification along with pre-amp outputs for additional zones, letting you add surround, height, or multi-room speakers one at a time as budget allows, without discarding your original investment in the receiver itself.
Position Your Speakers Correctly
Speaker placement has a bigger impact on final sound quality than almost any other decision you’ll make, and it costs nothing to get right. The goal is to build an accurate, even soundstage anchored around your main listening position.
For the front left and right speakers, aim to form an equilateral triangle with your primary seating position — roughly the same distance between the two speakers as between each speaker and your ears. Angle both speakers slightly inward (“toe-in”) so they point just past the outer edges of the seating area rather than straight ahead.
Center channels typically sit directly above or below the television, oriented so the tweeter is angled toward ear height at the seating position where possible; if it must sit well above or below ear level, a slight downward or upward tilt helps preserve dialogue clarity.
Surround speakers belong to the sides of the main seating area, mounted about one to two feet above ear height and angled downward slightly, while rear surrounds (in a 7.1 layout) sit behind the seating position. Height or Atmos speakers, whether ceiling-mounted or upward-firing modules placed on top of your front and surround speakers, aim to bounce sound off a flat, reasonably reflective ceiling directly above the listening area.
Avoid pushing bookshelf speakers flush against a back wall if you can help it; a few inches of clearance reduces unwanted bass reinforcement and boominess. If wall placement is unavoidable, many speakers include a rear port plug or a switch to compensate for boundary loading.
Fine-Tuning Toe-In by Ear
The exact toe-in angle for front speakers is one of the few adjustments best finished by ear rather than by strict measurement, since it depends on each speaker’s dispersion characteristics as much as room geometry. Start with speakers angled so their front baffles point directly at your listening position, then play a familiar vocal-centered track and slowly rotate each speaker outward in small increments, pausing to listen after each adjustment. As you rotate away from pointing directly at your ears, the image typically widens and the top end softens slightly; the right setting is usually just before the vocal starts to sound diffuse or the sense of “center” starts to blur.
Height matters here too — tweeters positioned well above or below seated ear height will sound noticeably different than the same speaker at ear level, since most tweeters are more directional than midrange or bass drivers. Where possible, use stands or shelf brackets that bring tweeters within a few inches of ear height for critical listening seats.
Common Placement Mistakes to Avoid
- Symmetrical mismatch — one front speaker tucked in a corner while the other sits in open space, creating an unbalanced stereo image.
- Center channel tucked inside a cabinet — muffled, boxed-in dialogue caused by insufficient clearance around the cabinet opening.
- Surrounds placed too far forward — this narrows the surround effect instead of enveloping the listening position from the sides.
- Height speakers aimed at an angled or acoustically absorptive ceiling — reduces the reflected overhead effect that Atmos content relies on.
- Subwoofer shoved directly into a corner without testing — often the loudest bass position, but rarely the tightest or most accurate.
Measuring Distances Accurately
A basic tape measure is one of the most underrated tools in the entire setup process. Measure the exact distance from each speaker to the main listening position and jot the numbers down — these will matter again during calibration in Step 8, where you can cross-check the receiver’s automatically detected distances against your own manual measurements. A significant mismatch between the two, more than a foot or so, usually indicates either a measurement error or a reflection interfering with the calibration microphone, both worth investigating before finalizing your setup.
Connect Your AV Receiver or Amplifier
With speaker locations decided, it’s time to bring everything back to the receiver or amplifier, which acts as the central hub for both audio processing and source switching. Start by connecting your TV, streaming devices, and game consoles into the receiver’s HDMI inputs rather than directly into the television, then run a single HDMI cable from the receiver’s HDMI ARC or eARC output back to the TV.
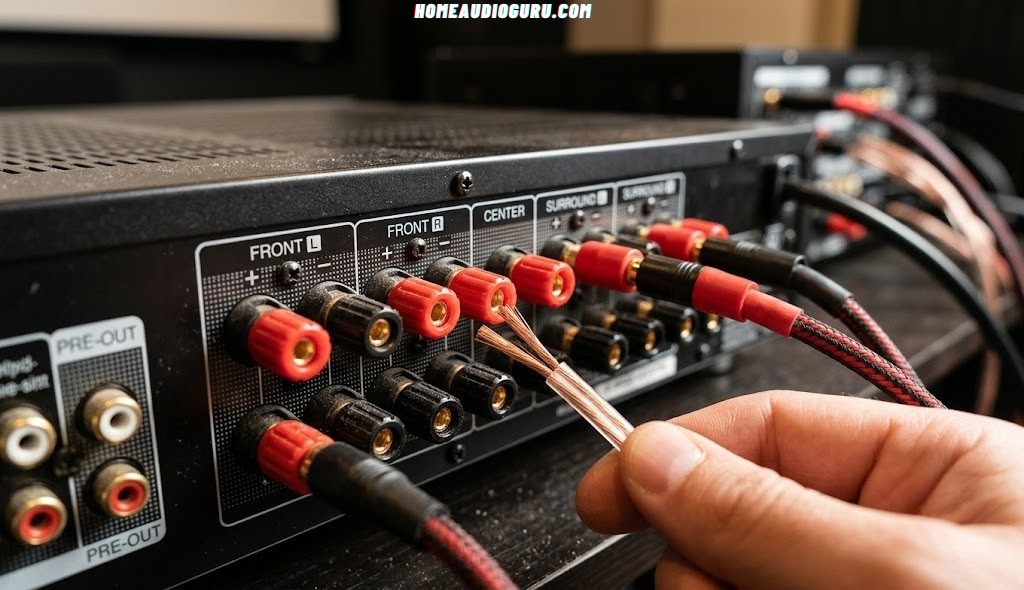
This “one cable to the TV” approach means the receiver handles all audio decoding and switching, while the TV remote’s volume and input controls can typically still pass through via HDMI-CEC. Next, connect speaker wire from each amplified output on the receiver to its corresponding speaker, matching positive and negative terminals carefully — reversed polarity on even one speaker will noticeably weaken bass and blur the stereo image.
If your receiver includes pre-amp outputs for a subwoofer, connect it using a standard RCA subwoofer cable rather than speaker wire, since most subwoofers include their own internal amplifier. Label each cable at both ends as you go; even a modest 5.1 system involves a surprising number of runs, and labeling now saves considerable troubleshooting time later.
Before powering on, double-check that speaker wire gauge and length match your run distances (see Step 6), that all HDMI cables are rated for high bandwidth if you’re passing 4K or 8K video, and that the subwoofer’s power cable is plugged directly into a wall outlet rather than daisy-chained through a low-quality power strip.
Understanding Your Receiver’s Rear Panel
The back of an AV receiver can look overwhelming at first glance, but the layout almost always follows a predictable logic once you know what to look for. HDMI inputs are typically grouped together and numbered, with one or two outputs clearly labeled for the TV and, on higher-end models, a second output for a projector in a separate zone. Speaker terminals are grouped by channel — front, center, surround, and sometimes a second set for a “zone 2” pair — and are almost always color-coded or clearly printed to match the corresponding channel.
Pre-amp outputs for one or two subwoofers sit separately from the amplified speaker terminals, since a subwoofer’s built-in amplifier only needs a line-level signal rather than powered speaker-level output. Network and USB ports, usually positioned near the bottom or side of the rear panel, handle firmware updates, streaming services, and sometimes external storage for offline music playback.
Sequencing Your First Power-On
Once wiring is complete, power on components in a deliberate order rather than all at once: start with the receiver, let it fully boot, then power on source devices like a streaming box or game console, and finally turn on the television. This sequence avoids some of the handshake issues that can occur when a TV boots before the device sending it a signal is ready, which is a common cause of a blank screen or “no signal” message on first setup.
With everything powered on, cycle through each input on the receiver one at a time, confirming that both picture and sound are present before moving to speaker-by-speaker testing in the receiver’s built-in test tone menu, which sends a short burst of noise to each channel in sequence so you can confirm every speaker is wired to the correct terminal and producing sound.
Do You Need Expensive Cables?
It’s a common and reasonable question once you start shopping for HDMI and speaker cables: does spending significantly more on premium cabling actually improve sound or picture quality? For digital connections like HDMI, the honest answer is that a cable either passes the full digital signal correctly or it doesn’t — once a cable is rated for the bandwidth your content requires, additional spending rarely produces an audible or visible improvement, since the signal is a stream of ones and zeros rather than an analog waveform that can subtly degrade.
Speaker wire is a little different, since it does carry an analog signal, but even here the practical differences between a reasonably well-made cable at the correct gauge and a dramatically more expensive “audiophile” cable are typically far smaller than differences in speaker placement or room acoustics. Your money is almost always better spent on an additional speaker, a better subwoofer, or acoustic treatment than on premium cabling once you’ve met the basic gauge and shielding requirements outlined in this guide.
Wire Everything and Manage Cables
Clean cable management isn’t just cosmetic — poorly routed wiring is one of the most common causes of hums, buzzes, and intermittent signal loss in home audio systems. Start by measuring each speaker run before cutting wire, adding a few extra feet of slack for repositioning later.
Run speaker wire along baseboards, under rugs, or through cable raceways rather than leaving it exposed across walkways. For in-wall or in-ceiling runs, use speaker wire rated CL2 or CL3, which meets fire safety codes for routing inside walls — standard unrated wire should never be pulled through wall cavities.
| Run Length | Recommended Gauge | Notes |
|---|---|---|
| Under 25 ft | 16 AWG | Standard for most bookshelf/surround runs |
| 25–50 ft | 16 AWG | Still acceptable for most 8-ohm speakers |
| 50–75 ft | 14 AWG | Reduces resistance loss on longer runs |
| 75+ ft or 4-ohm speakers | 12–14 AWG | Preserves dynamics on demanding loads |
Keep speaker wire and HDMI cables separated from power cables where possible, and avoid running them parallel to each other for long stretches — crossing at a perpendicular angle, if unavoidable, minimizes induced hum. Twist bare speaker wire ends tightly before inserting them into spring clips or banana plug connectors, and always double-check polarity at both ends of every run using the same colored stripe or ridge on the cable as a consistent reference.
Finally, bundle and secure cables with reusable velcro ties rather than permanent zip ties, since you’ll likely make small adjustments during calibration in Step 8.
Banana Plugs Versus Bare Wire
Bare speaker wire inserted directly into spring-clip terminals works perfectly well and is the simplest way to get started, but banana plug connectors make future adjustments meaningfully easier, especially in a setup you expect to fine-tune or expand over time. Banana plugs crimp or solder onto the wire ends once, then simply push into standard binding-post terminals, eliminating the need to strip and re-twist bare wire every time you disconnect a speaker to reposition it.
If you do use bare wire, strip only about half an inch of insulation, twist the strands tightly so no stray filaments can touch an adjacent terminal, and insert the wire fully into the clip or binding post before tightening. A loose strand bridging positive and negative terminals is a common, easily overlooked cause of a channel dropping out entirely or sounding distorted at higher volumes.
Hiding Wire in Rooms You Can’t Modify
Renters and anyone hesitant to drill into walls have several solid options short of full in-wall installation. Paintable cord covers that adhere along baseboards blend into most trim colors with a quick coat of matching paint. Flat, low-profile speaker wire designed to run under carpet edges or along door thresholds is another practical option for connecting rear surround speakers without a visible cable snaking across the floor.
For a fully wireless alternative to long speaker runs, some AV receivers support wireless surround speaker kits or wireless rear-channel transmitters that eliminate the physical cable run entirely, trading a small amount of ultimate reliability for dramatically simpler installation — a reasonable compromise in rental properties or rooms where drilling and fishing wire through walls isn’t practical.
Preventing Ground Loop Hum Before It Starts
A low, persistent hum from your speakers is almost always a ground loop — a small voltage difference between two components plugged into different outlets or circuits, often made worse by cable TV or antenna connections that introduce their own ground path. The simplest prevention is plugging every major audio and video component into the same power strip or outlet circuit, which keeps them all referenced to the same electrical ground and prevents the voltage difference that causes the hum in the first place.
If a hum appears despite a shared power source, a dedicated ground loop isolator inserted into the offending cable — often a cable box or antenna connection — resolves the vast majority of remaining cases without needing an electrician. Avoid the older practice of removing a component’s third grounding prong to “fix” hum; this is a genuine electrical safety hazard and should never be used as a troubleshooting shortcut.
A Simple Labeling System That Actually Gets Used
The labeling habit that survives long-term is almost always the simplest one. Rather than elaborate numbering schemes, label each cable end with the plain-language destination it connects to — “Left Front,” “Sub Out,” “Ceiling Height Left” — using a basic cable flag label or a strip of masking tape and a marker. This kind of plain, obvious labeling means that months or years later, when you or anyone else in the household needs to trace a connection, the answer is immediately legible rather than requiring a decoder key you’ve since forgotten.

Keep Your Setup Clean
A quality in-wall rated speaker wire kit makes long runs safer and far tidier.
Check Price on AmazonSet Up and Dial In Your Subwoofer
Bass is the most room-dependent part of any home audio system, which makes subwoofer placement uniquely important. Low frequencies are non-directional but highly susceptible to room modes — the resonant frequencies created by sound waves reflecting between parallel walls — so a subwoofer that sounds boomy in one corner might sound tight and controlled just a few feet away.
The subwoofer crawl remains the most reliable, no-equipment method for finding a strong bass position: temporarily place the subwoofer at your main seating location, play continuous bass-heavy content, then physically crawl around the floor perimeter of the room, pausing every couple of feet to listen. The spot where bass sounds fullest and least boomy is where the subwoofer should ultimately go.
Once placed, set the subwoofer’s crossover frequency — typically between 80Hz and 120Hz for most main speakers — so that your main speakers hand off bass duties to the subwoofer smoothly rather than both trying to reproduce the same frequencies. Many AV receivers will set this automatically during room correction, but it’s worth manually verifying afterward.
For rooms with particularly stubborn bass problems, especially open-concept layouts or rooms with only one or two solid walls, a second subwoofer placed asymmetrically can dramatically even out bass response across the listening area, reducing the peaks and nulls caused by room modes.
Good Subwoofer Signs
- Bass feels tight, not one-note or boomy
- Bass level stays consistent as you move around the room
- Low frequencies are felt as much as heard
Signs of Poor Placement
- Bass disappears or doubles in specific spots
- Certain notes sound louder than others (room mode)
- Rattling windows or furniture at moderate volume
Adjusting Subwoofer Gain and Phase
Once placement is settled, most standalone subwoofers offer manual gain and phase controls on their rear panel, in addition to whatever level adjustment your receiver’s calibration applies digitally. Set the physical gain knob to roughly its midpoint before running automatic calibration, since starting at either extreme leaves the receiver’s own level adjustment with too little headroom in one direction.
The phase control, usually a simple switch or dial marked zero to 180 degrees, adjusts the timing of the subwoofer’s output relative to your main speakers. With bass-heavy content playing, slowly adjust the phase control while listening for the point where bass sounds fullest and most connected to the rest of the mix — an incorrect phase setting can cause bass to partially cancel itself out, leaving the low end feeling thin even from a genuinely powerful subwoofer.
When a Second Subwoofer Is Worth Adding
A single subwoofer, no matter how well placed, still interacts with a room’s specific dimensions in ways that create uneven bass at different seating positions — strong in one seat, weak just a few feet away. Adding a second subwoofer, positioned asymmetrically rather than as a mirror-image pair, smooths these peaks and nulls across a wider listening area, which matters most in larger rooms, open floor plans, or rooms with more than one row of seating. For a single-seat listening room, a well-placed single subwoofer is often perfectly sufficient, making a second unit a refinement rather than a necessity.
Run Room Correction and Calibration
Once every speaker is wired and positioned, automatic room correction is what actually ties the system together. Most modern AV receivers include a built-in calibration system — using brand-specific technologies with names like Audyssey, YPAO, Dirac Live, or MultEQ — that uses an included microphone to measure how each speaker sounds from multiple positions around your room.
To run calibration, place the included microphone on a tripod (or a stack of books) at exact ear height for your main seating position, connect it to the receiver, and follow the on-screen prompts. The system plays test tones through each speaker in sequence, measuring arrival time, level, and frequency response, then repeats the process at several additional seating positions if your couch is large or if you have multiple rows.
When calibration finishes, review the results before accepting them. Check that the detected speaker sizes, distances, and crossover point roughly match what you expect from your actual room measurements; if a distance reading looks drastically wrong, a stray reflection or a nearby noise source may have interfered with that particular test tone, and it’s worth re-running the measurement.
For listeners who want to go further, dedicated room correction software such as Dirac Live allows manual target curve adjustments and more granular control over the correction filters than most stock manufacturer solutions, though it typically requires purchasing a license and a supported measurement microphone.
Room correction won’t fix serious physical placement mistakes, but layered on top of the placement work from Steps 4 and 7, it’s what pulls a good setup into a genuinely great-sounding one.
Measuring at Multiple Seats
If your room regularly seats more than one or two people, take the extra few minutes to measure at every seat that matters, not just the single “best” chair. Most calibration systems average their correction across all measured positions, which produces a more universally accurate result across a couch rather than a setting that’s flawless in one exact seat but noticeably off just a few feet to either side. A reasonable pattern is one measurement at the center of the primary seating area, then one measurement at each end of the couch, and one or two additional positions if you have a second row.
Keep the room as quiet as possible during measurement — turn off ceiling fans, pause conversations, and silence phones, since the test tones are relatively quiet by design and background noise can throw off the microphone’s readings, particularly for bass frequencies.
Manual Touch-Ups After Automatic Calibration
Automatic room correction gets a system most of the way there, but a short manual listening session afterward often reveals small adjustments worth making. Play a track you know intimately and listen specifically for whether dialogue-range frequencies feel natural, whether bass feels appropriately present without overwhelming the mix, and whether the overall tonal balance matches your personal preference rather than a strictly neutral target curve. Most receivers allow manual trims of plus or minus a few decibels per channel on top of the automatic result, which is a reasonable, low-risk way to nudge the sound toward your taste without undoing the underlying correction.
Saving and Comparing Calibration Profiles
Many receivers let you save multiple calibration profiles, which is worth using if your room changes meaningfully between different situations — for example, one profile for a normal furnished layout and a second for a rearranged setup during a larger gathering. Save your initial, professionally-measured profile as a baseline before making manual adjustments, so you always have a known-good reference point to return to if a later change makes things sound worse rather than better.
Integrate Streaming and Smart Features
Modern home audio systems rarely operate in isolation from streaming services and smart home ecosystems, and getting this integration right early prevents a frustrating patchwork of remotes and apps later. Most current AV receivers and soundbars include built-in support for services like Spotify Connect, Apple AirPlay, Chromecast built-in, or Bluetooth, often several at once.
Start by connecting the receiver or soundbar to your home Wi-Fi network through its companion app rather than relying solely on Bluetooth, since Wi-Fi-based streaming typically offers better range, more stable connections, and higher audio quality ceilings for services that support lossless or high-resolution streaming.
If you use a voice assistant, check whether your receiver or soundbar has native support before adding a separate smart speaker into the mix; native integration lets you control volume, source switching, and playback with voice commands without needing to route audio through an additional device. For households already invested in a specific smart home ecosystem, confirming compatibility before purchase saves considerable setup headaches.
Once your primary streaming connections are configured, take a few minutes to set default inputs, rename sources in the receiver’s on-screen menu to match your actual devices (“Living Room Apple TV” rather than “HDMI 2”), and test each streaming path end-to-end before considering the system finished.
Handling Multiple Streaming Protocols Gracefully
Many households end up with a mix of device ecosystems — an iPhone here, an Android tablet there, a smart speaker from a third platform in the kitchen — and a receiver that handles several streaming protocols natively avoids forcing everyone onto a single app just to play music. Where multiple protocols are supported simultaneously, it’s worth testing which one delivers the most stable connection specifically in your home before defaulting to it as the “house standard,” since real-world Wi-Fi congestion and device compatibility can vary more than spec sheets suggest.
For music-first households, check whether your receiver or streaming platform supports gapless playback and, if it matters to you, higher-resolution lossless formats — not every wireless protocol handles these equally well, and confirming support before you build a large digital music library around one service saves a frustrating migration later.
It’s also worth testing streaming quality settings directly within each service’s own app, since many platforms default to a compressed, data-saving quality tier rather than their highest available setting. A few taps into a settings menu to select the highest quality streaming tier your connection and subscription plan support is a free, immediate upgrade that costs nothing beyond a moment of setup.
Firmware and App Updates
Streaming and smart features are the parts of a home audio system most likely to improve — or occasionally change — through software updates after purchase. Enable automatic firmware updates on your receiver or soundbar where available, and periodically check the companion smartphone app for updates as well, since new streaming service support and bug fixes are frequently delivered this way rather than through hardware changes.
Common Streaming Setup Pitfalls
| Pitfall | Why It Happens | How to Avoid It |
|---|---|---|
| Device connects to a guest Wi-Fi network | Phone auto-joined the wrong network | Manually verify network name before pairing |
| Audio plays through TV speakers instead of the system | TV audio output setting not changed | Set TV audio output to “external speakers” or ARC |
| Bluetooth pairs but audio is choppy | Too many 2.4GHz devices nearby | Switch router to 5GHz where possible for other traffic |
| Voice assistant controls the wrong zone | Multiple speakers share a similar name | Give every zone and speaker a distinct, clear name |
Add Multi-Room Audio
If you want music playing consistently across the kitchen, living room, and patio, multi-room audio extends your home theater investment into a whole-home listening system. Most current platforms let you group compatible speakers into “zones” that can play the same audio in sync, or run entirely independent content in different rooms simultaneously.
If your AV receiver supports multi-room output directly, you can often route zone 2 or zone 3 audio to powered speakers or in-ceiling speakers in other rooms without any additional hardware. If not, standalone wireless speakers built on a common multi-room platform communicate directly with each other and your router, largely independent of the main home theater receiver.
For the most reliable performance, place your router or a mesh Wi-Fi node centrally rather than at one end of the home, and consider a wired Ethernet connection for any stationary multi-room speaker if your walls are thick enough to cause Wi-Fi dropouts. Naming each zone clearly and consistently within the app — matching how your household actually refers to each room — makes day-to-day use far smoother than technical default names.
Multi-room audio is also a natural home for smaller, design-focused speakers that don’t need to carry surround duty; compact soundbars and single wireless speakers reviewed in our Bose Smart Soundbar review and Vizio 5.1 Soundbar SE review both work well as secondary zone speakers in addition to their primary living room role.
Letting Guests Use the System Without Full Access
If your multi-room platform supports guest access, setting it up ahead of gatherings lets visitors queue up music in a shared zone without needing your personal streaming account credentials or full control over every room in the house. This small step avoids the common awkward moment of handing over a phone logged into a personal account, and it keeps bedroom or private zones out of reach of guests who only need access to the main entertaining spaces.
Grouping and Scheduling Zones
Beyond simply playing the same song in two rooms, most multi-room apps let you build saved groups for recurring situations — a “morning kitchen and dining” group for breakfast, a “party” group that spans the whole downstairs, or a “quiet zone” that excludes bedrooms during a gathering. Setting these up once, rather than manually selecting speakers every time, turns multi-room audio into something the household actually uses day to day rather than a novelty that gets ignored after the first week.
Some platforms also support basic scheduling, useful for a gentle wake-up playlist in a bedroom zone or ambient background music that starts automatically in shared spaces at a set time. These features live entirely in the companion app rather than requiring any additional wiring once the zones themselves are established.
Balancing Volume Consistency Across Zones
Because different rooms have different sizes, background noise levels, and speaker capabilities, a single volume percentage rarely sounds equally loud in every zone. Spend a few minutes walking through each zone during initial setup, adjusting each speaker’s relative volume offset (available in most apps) so that a “50%” volume level feels roughly consistent whether you’re in the kitchen or on the patio — this small calibration step prevents the jarring experience of a song suddenly blasting or barely audible as it follows you between rooms.

Extend Sound to Every Room
See current pricing on a top-rated wireless multi-room speaker for kitchens, offices, and patios.
Check Price on AmazonTroubleshoot Common Problems
Even a carefully planned setup occasionally runs into a hum, a dropout, or an unbalanced channel. Most issues trace back to one of a small handful of causes, and working through them systematically saves considerable frustration.
| Symptom | Likely Cause | Fix |
|---|---|---|
| Persistent hum from speakers | Ground loop between components | Use a ground loop isolator or single shared outlet/power conditioner |
| One channel much quieter | Reversed polarity or loose wire | Recheck positive/negative connections at both ends |
| Bluetooth audio cuts out | Wi-Fi interference or distance | Move router/speaker closer, switch Wi-Fi channel |
| No sound from center channel | Incorrect speaker size setting | Re-run room correction, verify “small/large” setting |
| Subwoofer too boomy | Poor placement or crossover set too high | Redo subwoofer crawl, lower crossover frequency |
| Lip-sync / audio delay | Processing lag between video and audio | Enable lip-sync adjustment in receiver’s audio settings |
| Remote doesn’t control volume | HDMI-CEC not enabled | Enable CEC on both TV and receiver menus |
When troubleshooting, isolate variables one at a time rather than changing several settings simultaneously — swap one cable, test one speaker on its own, or disable one wireless feature, then listen again before moving to the next possible cause. Keeping a simple written log of what you changed and when makes it much easier to identify what actually fixed (or caused) a problem, especially in more complex 7.1.4 setups with many interacting components.
If a problem persists after working through the obvious causes, check your receiver manufacturer’s support site for a firmware update; a surprising number of audio glitches, especially around HDMI handshake issues and Bluetooth stability, are resolved through routine firmware releases rather than hardware fixes.
When to Suspect the Room, Not the Gear
It’s easy to assume a disappointing sound means faulty equipment, but a surprising number of “bad speaker” complaints are actually room problems rather than hardware problems. A boxy, hollow-sounding midrange often points to a nearby wall or cabinet reflection rather than a defective driver. Bass that sounds strong in one spot and nearly absent a few feet away almost always indicates a room mode issue rather than a subwoofer fault. Before assuming a component needs replacing or repairing, revisit placement and room correction — the fixes in Steps 4, 7, and 8 resolve the majority of tonal complaints that first appear to be equipment issues.
Building a Simple Maintenance Checklist
A short recurring checklist catches most problems before they become noticeable during a movie night or gathering. Roughly every few months, it’s worth confirming that all HDMI and speaker connections remain snug (cables can loosen slightly over time, especially near frequently moved components), checking for any receiver firmware updates, glancing at ventilation to make sure nothing is blocking the receiver’s cooling vents, and doing a quick listening pass across all channels using the receiver’s built-in test tones to catch any channel that’s drifted out of balance.
Network-Related Issues in Streaming-Heavy Systems
As home audio systems lean more heavily on Wi-Fi and app-based control, network troubleshooting has become just as relevant as speaker wiring in many households. If a receiver, soundbar, or multi-room speaker regularly loses its connection, start by checking how many devices are competing for bandwidth on the same Wi-Fi band, since audio streaming devices often share congested airwaves with phones, laptops, smart TVs, and other smart home gadgets. Moving stationary audio components to a wired Ethernet connection where possible removes them from Wi-Fi congestion entirely and is one of the most reliable fixes for persistent streaming dropouts.
If a router or mesh network was set up before the audio system was installed, double-check that any relevant device isn’t sitting in a genuine dead zone — thick walls, metal ductwork, and large mirrors can all weaken a Wi-Fi signal more than expected. A mesh extender node placed roughly halfway between the router and the affected component often resolves stubborn dropout issues without needing to run a physical Ethernet cable.
Maintain and Plan Future Upgrades
A home audio system isn’t a “set it and forget it” purchase; a little routine maintenance keeps it performing at its best, and thinking ahead about upgrades prevents costly do-overs. Dust speaker drivers and grilles periodically with a soft brush, keep vents on receivers and amplifiers clear for proper cooling, and avoid stacking other equipment directly on top of an AV receiver, which can trap heat and shorten component life.
Revisit your room correction any time you rearrange furniture, add or remove rugs and curtains, or move a speaker even a foot or two — small placement changes can shift the sonic character of a room more than people expect. It’s a good habit to recalibrate at least once a year even without obvious changes, since seasonal humidity and temperature shifts can subtly affect how a room sounds.
When planning future upgrades, prioritize based on where your current system falls shortest: if dialogue clarity is your biggest frustration, a dedicated center channel upgrade often delivers more improvement than a new receiver. If movies feel flat and one-dimensional, adding height channels for Dolby Atmos tends to be the single most transformative single upgrade available. If you mostly listen to music, a better set of front speakers usually outperforms spending the same budget on additional surround channels.
Keep your receiver’s firmware updated, hold onto original speaker packaging if you have the storage space (useful for resale or warranty claims), and document your final speaker distances, levels, and crossover settings somewhere safe — that reference makes any future troubleshooting or expansion dramatically faster than starting from scratch.
For a broader view of complete systems at different budget levels as you plan your next upgrade, our best home audio systems hub page rounds up current top picks across soundbars, AVR-based theaters, and stereo setups.
Protecting Your Investment
A surge protector or dedicated power conditioner is one of the cheapest, most overlooked forms of insurance for a home audio system. Receivers, amplifiers, and subwoofers all contain sensitive internal components that a single power surge from a storm or grid fluctuation can damage instantly. A quality surge protector rated for the combined wattage of your system is inexpensive relative to the cost of the equipment it protects, and it’s worth treating as a mandatory line item rather than an optional accessory.
If you live somewhere prone to frequent power fluctuations or outages, a battery backup unit adds an additional layer of protection, giving your receiver and networked components time to shut down gracefully rather than losing power abruptly, which can occasionally corrupt saved calibration settings or firmware.
Knowing When It’s Time to Replace Versus Upgrade
Distinguishing between a component that needs replacing and one that simply needs recalibrating saves both money and frustration. A receiver that struggles to pass modern HDMI signals reliably, refuses firmware updates, or has physically failed channels is a legitimate candidate for full replacement. Speakers, on the other hand, rarely “wear out” in normal home use and are far more commonly a placement or calibration issue than a failed component — before assuming a speaker needs replacing, revisit Steps 4, 7, and 8 to rule out fixable causes first.
Keeping a Setup Journal
A simple notes file or even a physical notebook documenting your speaker models, exact placement distances, crossover settings, and any calibration quirks you discovered along the way pays dividends far beyond the initial setup. It becomes an invaluable reference when troubleshooting a sudden change, when adding a new component months or years later, or when helping a friend or family member set up a similar system in their own home based on what worked well in yours.
Frequently Asked Questions
Do I need an AV receiver to set up a home audio system?
Not always. A soundbar or a wireless multi-room speaker system can deliver great sound without a receiver. An AV receiver becomes important once you want true surround sound with multiple discrete speaker channels, advanced room correction, or the flexibility to switch between many source devices.
How far apart should my front left and right speakers be?
As a general rule, place your front left and right speakers so they form roughly an equilateral triangle with your main listening position. For most living rooms this means spacing them six to ten feet apart, angled slightly inward toward the seating area.
Where is the best place to put a subwoofer?
The classic method is the subwoofer crawl: place the sub at your main seating position, then crawl around the room’s floor perimeter until you find the spot where bass sounds tightest and most even, then put the subwoofer there.
What is room correction and do I really need it?
Room correction uses a measurement microphone to analyze how sound behaves in your specific room, then automatically adjusts speaker levels, distances, and equalization. It’s not mandatory, but it meaningfully improves tonal balance and bass evenness.
Can I mix speaker brands in one home audio system?
Yes. The main consideration is tonal matching — speakers with similar voicing blend more seamlessly for surround effects, while very different tonal signatures between channels can make transitions sound less natural.
How do I connect a soundbar to my TV?
Most modern soundbars connect through an HDMI ARC or eARC port, letting a single cable carry both audio and control signals. If your TV lacks ARC, an optical digital cable is a reliable fallback.
What gauge speaker wire should I use for in-wall runs?
For most runs under fifty feet, 16-gauge wire is sufficient. For longer runs or low-impedance speakers, 14-gauge wire reduces resistance losses and preserves dynamics.
Is wireless multi-room audio as good as a wired system?
Modern wireless platforms have closed much of the gap and offer far more flexible placement. For critical listening, wired still removes any small risk of compression, but wireless performs excellently for everyday use.
How high should I mount my surround speakers?
Generally one to two feet above ear level when seated, angled slightly downward toward the listening position, which keeps ambient effects enveloping without being distractingly localized.
Why does my system sound different at night versus during the day?
Furniture, curtains, and even changed volume levels alter how sound reflects and how human hearing perceives bass and treble at different volumes — this is a normal acoustic effect, not a system fault.
How often should I recalibrate my home audio system?
Recalibrate any time you move a speaker or change the room layout in a way that affects sound reflections. Outside of that, an annual recalibration is a reasonable habit.
Bringing It All Together
Setting up a home audio system rewards patience more than perfection on the first try. Get the room assessment and speaker placement right, wire everything cleanly, let room correction do its job, and you’ll have a system that sounds noticeably better than the sum of its individual components. From there, streaming integration and multi-room expansion turn a single great-sounding room into a genuinely enjoyable, whole-home listening experience.
It’s worth remembering that this process doesn’t have to happen all in one weekend. Many of the best-sounding home systems are built up gradually: a soundbar or basic stereo pair first, a proper subwoofer once the bass shortfall becomes obvious, a dedicated center channel once dialogue clarity starts to matter, and height or surround speakers once the core system is dialed in and the budget allows. Treating your setup as an evolving project rather than a single purchase takes the pressure off getting everything perfect immediately, and it often leads to better decisions overall since each addition is chosen based on lived experience with the system rather than guesswork from a spec sheet.
Whatever pace you take, the twelve steps in this guide — from that very first walk around your room to the ongoing habit of periodic recalibration — form a complete, repeatable framework you can return to any time your space, your gear, or your listening habits change. Bookmark it, share it with anyone else helping you set up the room, and revisit the relevant section whenever you rearrange furniture, add a new speaker, or move to a new home entirely.
Ready to compare complete setups before you buy? Browse our full best home audio systems guide for current top picks across every budget and room type.
Shop Home Theater Systems on Amazon