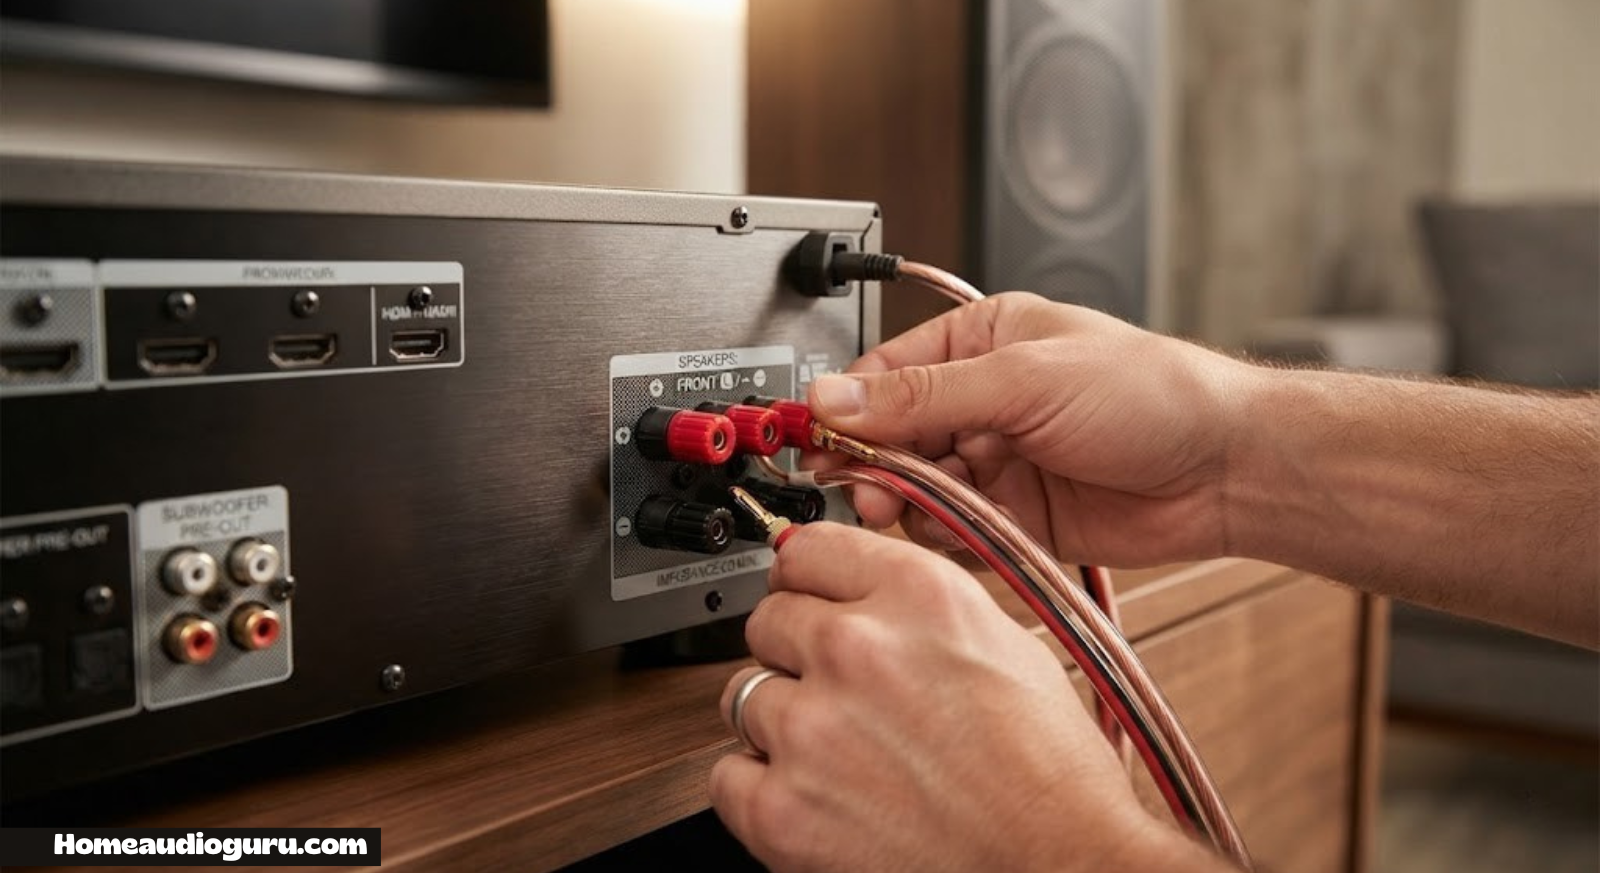
How to Connect Speakers to a Receiver: A Complete, No-Guesswork Guide
Whether you’re wiring a simple stereo pair or building out a full 7.1.2 Dolby Atmos setup, getting the connections right the first time saves you from buzzing tweeters, blown channels, and a soundstage that never quite locks into place. Here’s everything you need, step by step.
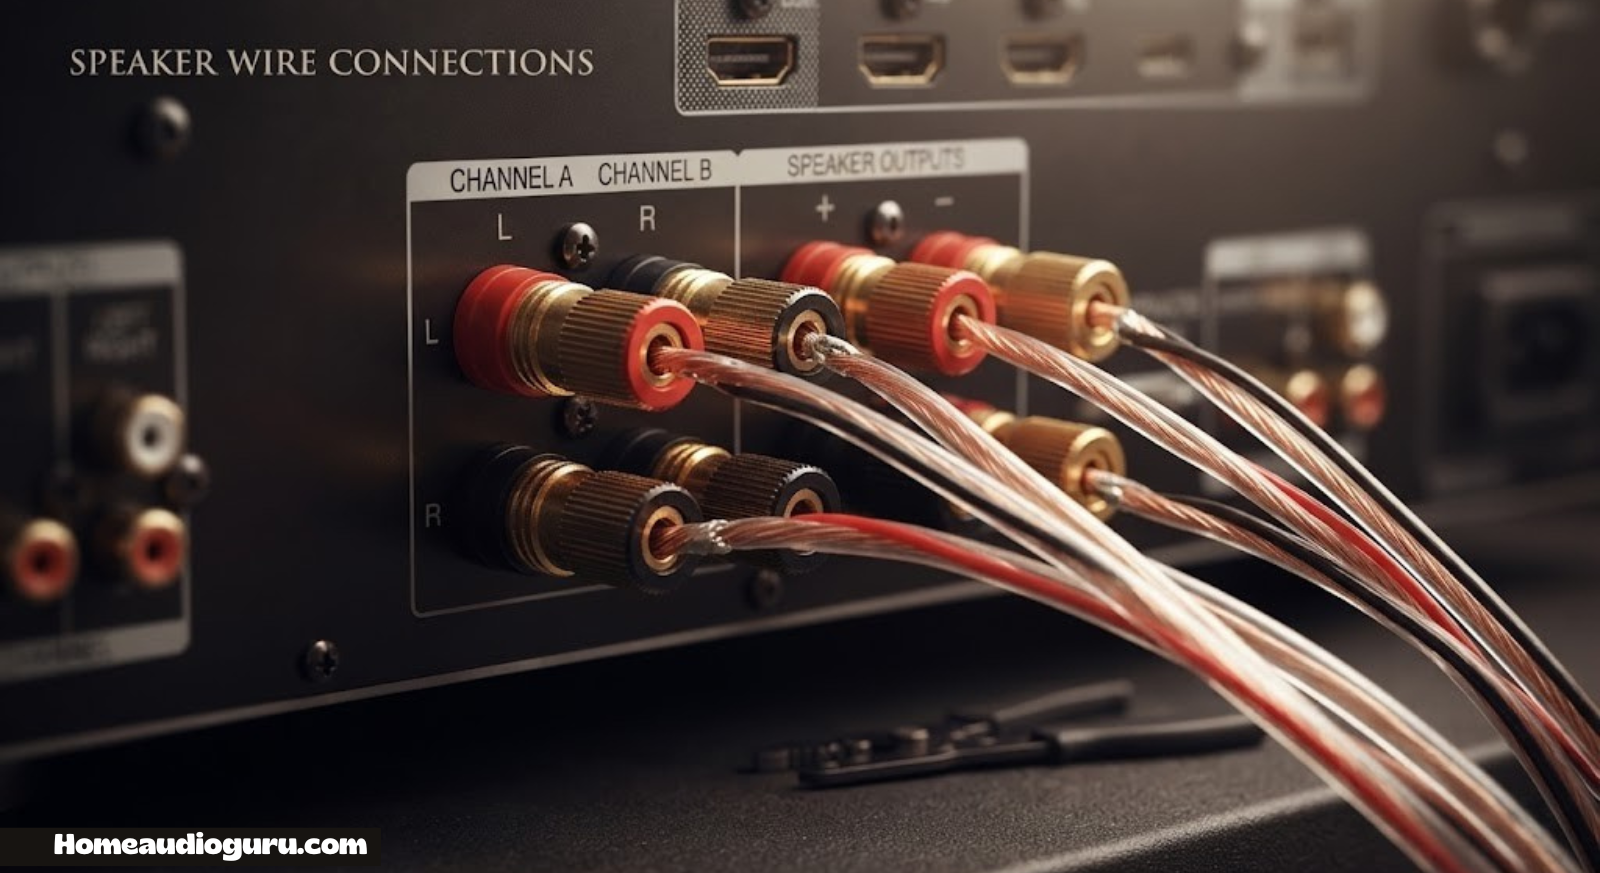
A receiver is only as good as the connection between it and your speakers. You can spend a small fortune on a beautiful home audio receiver and a matched set of towers, bookshelfs, and a subwoofer, and still end up with a flat, lifeless soundstage because a single wire was crossed, a terminal was loose, or the wrong channel was fed the wrong speaker. The good news is that connecting speakers to a receiver is a mechanical skill, not an audio-engineering one. Once you understand what each terminal does, how polarity works, and why wire gauge matters, the whole process takes less time than unboxing the speakers themselves.
This guide walks through both of the two main ways people wire speakers — banana plugs and bare wire — plus how to route channels correctly for stereo, 5.1, 7.1, and Dolby Atmos setups, how to pick the right wire gauge for your room, and how to spot and fix the handful of problems that account for almost every “my speaker sounds off” complaint. If you haven’t set up the rest of your system yet, it’s worth reading through our guide on how to set up a home theater receiver first, since speaker wiring is just one piece of that larger process.
What You’ll Need Before You Start
Gathering everything up front turns a fiddly, on-your-knees-behind-the-TV-stand job into a fifteen-minute task. Here’s the full kit:
- Speaker wire — enough length to reach every speaker with a little slack, in an appropriate gauge (more on this in the wire gauge section).
- Wire strippers — a basic pair with a 12–22 AWG notch works for almost every home speaker wire.
- Banana plugs or spade connectors (optional but recommended) — these make future adjustments dramatically easier and give you a more reliable connection than bare wire alone.
- A small flathead screwdriver — needed if your receiver uses spring-clip terminals rather than binding posts.
- Wire labels or colored tape — for marking which run goes to which speaker before you start threading cable behind furniture.
- A flashlight or phone light — receiver terminals are almost always in a dim, awkward spot.
- Your receiver’s manual or channel map — to confirm which terminal pair corresponds to which channel (front left, center, surround right, and so on).

Recommended: A set of gold-plated banana plugs makes wiring faster and connections noticeably more secure than bare wire.
Shop Banana Plugs on AmazonUnderstanding Receiver Speaker Terminals
Flip your receiver around and you’ll find a bank of colored terminals grouped in pairs — one pair per speaker channel. Every pair has a positive (usually red or marked “+”) and a negative (usually black or marked “−”) post. Getting this pairing backwards on even one speaker is the single most common wiring mistake, and it’s the cause of the “thin, hollow” sound people describe when a system is technically working but doesn’t sound right.
Most mid-range and higher-end receivers use binding posts: knurled, twist-to-open terminals that accept bare wire, spade connectors, or banana plugs. Entry-level receivers and older units often use spring clips instead: press a small lever or squeeze a clip, insert bare wire, and release. Spring clips only accept bare wire — they won’t take a banana plug — so if your receiver has them, skip ahead to the bare-wire method below.
Binding Posts
- Accept bare wire, spades, or banana plugs
- Tighter, more secure long-term grip
- Standard on most AV receivers above entry level
Spring Clips
- Bare wire only — no banana plugs
- Faster for quick, temporary setups
- More common on budget or compact receivers
Speaker Wire Basics: Polarity, Gauge, and Length
Speaker wire is just two conductors bonded together, but the way they’re marked matters. Almost every spool has a printed stripe, a ribbed texture, or a colored tracer line running along one conductor only — that’s your positive lead. The plain, unmarked side is negative. Pick a convention on day one (for example, “the striped side always goes to red”) and stay consistent across every speaker, because polarity has to match at both ends: receiver terminal to speaker terminal, positive to positive, negative to negative, on every single channel.
Two other variables matter before you cut a single length of wire: gauge (thickness) and run length. Thinner wire has more resistance, and resistance climbs with distance, so a long run to a rear surround speaker needs thicker wire than a three-foot hop to a center channel sitting right under the TV. We cover the exact numbers in the wire gauge and length guide further down, but as a rule of thumb: 16 AWG is fine for most runs under 50 feet, and 14 AWG is worth the extra cost for anything longer or for high-power towers.
Method 1: Connecting Speakers with Banana Plugs (Recommended)
Banana plugs snap into binding posts with a satisfying click and never need to be re-stripped or re-tightened once installed, which makes this the method we recommend for anyone with binding-post terminals. Here’s the full six-step process.
Measure and Plan Each Wire Run
Before cutting anything, walk the actual path each cable will take — along the baseboard, behind a bookshelf, through a wall channel — and add roughly two extra feet per run for slack. Label each cut length immediately with tape (e.g., “Front Left,” “Surround Right”) so nothing gets mixed up later.
Strip and Twist the Wire Ends
At the receiver end, strip about half an inch of insulation from each conductor. Twist the fine copper strands tightly so no loose filaments can touch the neighboring terminal and cause a short.
Crimp or Screw On the Banana Plugs
Insert the twisted positive lead into the red-marked plug and the negative lead into the black-marked plug, then tighten the set screw or crimp collar depending on your plug style. Give each a firm tug to confirm it’s seated.
Match Polarity at the Receiver
Push the red plug into the red (+) binding post for that channel and the black plug into the black (−) post. Repeat for every channel, double-checking the channel label on the receiver’s back panel against your wire tags from Step 1.
Connect the Speaker End
Repeat the same red-to-positive, black-to-negative logic at the speaker’s own terminal cup or binding posts. Most bookshelf and tower speakers label their posts with a plus and minus sign molded right into the plastic or metal housing.
Test Each Channel Individually
Play a mono test tone or a familiar mono voice track and step through each channel one at a time in your receiver’s speaker test menu. A correctly wired speaker sounds tight and centered; a reversed-polarity speaker sounds thin and slightly out of phase with its pair.

Need fresh wire for the job? Look for oxygen-free copper (OFC) in the gauge that matches your longest run.
Shop Speaker Wire on AmazonMethod 2: Connecting Speakers with Bare Wire (Spring Clips or Binding Posts)
If your receiver only has spring clips, or you’d simply rather skip banana plugs, bare wire works perfectly well — it just requires a little more care to keep loose strands from touching the wrong terminal.
Strip and Twist Both Ends
Strip about three-quarters of an inch of insulation (slightly more than for banana plugs, since bare wire needs enough exposed copper to wrap fully around the post or slide deep into a spring clip) and twist the strands tight.
Open the Terminal and Insert the Wire
For spring clips: press the lever down, insert the bare copper fully into the hole, then release the lever to clamp it. For binding posts: twist the post counter-clockwise to open the hole, insert the wire, then twist clockwise to tighten firmly.
Setting Up Channels Correctly
Wiring is only half the job — the wire has to land on the right channel. Modern AV receivers label their back panel with abbreviations like FL/FR (front left/right), C (center), SL/SR (surround left/right), SBL/SBR (surround back), and SW (subwoofer, usually via a separate RCA/LFE cable rather than speaker wire). If you’re building anything beyond a basic stereo pair, our breakdown of how receiver channels work is worth a read, since terminal layouts vary quite a bit between a 5.1 receiver and a 9.2-channel flagship.
For an object-based format like Atmos, height or up-firing channels get their own dedicated terminals (often labeled Height 1/Height 2 or “Atmos”), separate from the standard 5.1 or 7.1 bed. If you’re not sure what that layer actually adds to the experience, our guide on what Dolby Atmos means explains the format in plain terms before you commit to running height-channel wire through your ceiling.
| Setup | Channels | Typical Terminal Labels |
|---|---|---|
| Stereo | 2.0 | FL, FR |
| Home theater basic | 5.1 | FL, FR, C, SL, SR, SW |
| Extended surround | 7.1 | FL, FR, C, SL, SR, SBL, SBR, SW |
| Dolby Atmos | 5.1.2 / 7.1.2 | Adds Height 1/Height 2 (or “Atmos”) pair |
Speaker Placement by Channel
Correct wiring means nothing if the physical placement fights the channel assignment. A quick placement checklist:
- Front left/right: flanking the screen at roughly ear height when seated, angled slightly toward the listening position.
- Center: directly above or below the screen, since it carries most dialogue.
- Surrounds: to the sides of the main seating area, slightly behind it, at or slightly above ear height.
- Surround back (7.1): directly behind the seating position.
- Height/Atmos: ceiling-mounted or up-firing modules on the front and/or rear speakers, bouncing sound off the ceiling.
- Subwoofer: placement matters less for wiring since bass is non-directional, but corner placement often reinforces low frequencies unevenly — a little experimentation goes a long way.
Wire Gauge & Length Guide
Speaker wire gauge is measured in AWG (American Wire Gauge), where a lower number means thicker wire. Thicker wire carries current with less resistance, which matters more as runs get longer or as your speakers demand more power.
| Run Length | Recommended Gauge | Notes |
|---|---|---|
| Under 25 ft | 16 AWG | Fine for most bookshelf and center speakers |
| 25–50 ft | 16–14 AWG | Step up to 14 AWG for 4-ohm or high-power speakers |
| 50–100 ft | 14–12 AWG | Common for surround/rear runs through walls |
| Over 100 ft | 12 AWG | Long in-wall runs, high-power towers |
Matching Speaker Impedance & Power to Your Receiver
Every speaker lists a nominal impedance, usually 4, 6, or 8 ohms, and every receiver channel lists a power rating tied to a specific impedance. Pairing an 8-ohm-rated receiver channel with 4-ohm speakers isn’t automatically dangerous on modern gear, but it does draw more current and generate more heat, so it’s worth confirming your receiver explicitly supports 4-ohm loads before wiring them up. If you’re still shopping for a receiver or trying to figure out how much amplification your room actually needs, our guide on how many watts you need for a receiver breaks the math down by room size and speaker sensitivity.
Signs of a Good Match
- Receiver spec sheet lists support for your speaker’s impedance
- Volume sounds full well below max output
- Receiver stays cool during extended listening
Signs of a Mismatch
- Receiver shuts off or shows a protection error at moderate volume
- Noticeable heat from the receiver chassis
- Distortion appears well before you reach a comfortable listening level
Calibrating Your System After Wiring
Once every channel is connected and tested individually, run your receiver’s automatic calibration routine (Audyssey, YPAO, Dirac, or whatever your brand uses). This measures distance, level, and frequency response for each speaker using a supplied microphone and adjusts the output so nothing overpowers the mix. Our full walkthrough on how to calibrate receiver speakers covers microphone placement and how to interpret the results if a channel comes back flagged as “not detected” — which, more often than not, traces back to a wiring issue caught right here at setup.
Troubleshooting Common Connection Problems
| Symptom | Likely Cause | Fix |
|---|---|---|
| Thin, hollow sound from a pair of speakers | Reversed polarity on one speaker | Swap the + and − leads on the affected speaker |
| No sound from one channel | Loose connection or wire not seated in terminal | Re-strip and reinsert, confirm firm contact |
| Crackling or popping at power-on | Stray copper strand bridging terminals | Re-strip cleanly, twist tightly, re-seat |
| Receiver shows a protection/overload error | Impedance mismatch or a short between + and − leads | Check speaker ohm rating and inspect for shorted wire |
| Distant channel sounds noticeably quieter | Wire gauge too thin for the run length | Upgrade to a thicker gauge on that run |
Wired vs. Wireless Speaker Connections
Not every speaker in a modern setup needs to touch a binding post. Wireless surrounds, portable Bluetooth speakers, and smart speakers have become common companions to a wired front stage. Before deciding to run wire through a wall, it’s worth understanding the trade-off — our comparisons of the best Bluetooth speakers for home use and the honest answer to whether wireless speakers lose sound quality lay out exactly where compression and latency come into play, and our piece on whether wireless speakers are actually any good covers the reliability side of things.
Wired Speakers
- No compression, no dropouts, no pairing issues
- Lower latency — critical for lip-sync in movies
- One-time setup effort, then it’s invisible
Wireless Speakers
- Far easier to install in rentals or finished rooms
- Some quality trade-off depending on codec
- Convenient for smart speakers like an Echo Dot or Echo Studio layered into the room
Thinking of Upgrading Your Receiver or Speakers?
If your current receiver is short on channels, watts, or HDMI inputs, it’s worth reading through comparisons before you commit to new wiring. Our roundups of the best Denon receivers, best Yamaha receivers, best Sony receivers, best Onkyo receivers, and best Marantz receivers each dig into terminal count, per-channel power, and Atmos support so you know exactly what you’re wiring into before you buy. If you’re deciding between a full receiver-and-speaker setup versus a simpler all-in-one solution, our receiver vs. soundbar comparison and roundup of the best home audio systems are good starting points, alongside our guide to setting up a home audio system from scratch.
Budget-conscious readers building out a first system might also compare our picks for the best home stereo system under $500 against a larger build like the best home theater system under $10,000 to see how far a wiring investment scales with the gear behind it. And if a soundbar is more your speed for a secondary room, our reviews of the Polk MagniFi Mini, Samsung B-Series soundbar, Sony HT-S2000, Bose Smart Soundbar, and Vizio 5.1 Soundbar SE cover setups that skip speaker wire almost entirely, alongside compact options like the Marshall Acton III and Echo Dot Max.
And once the wiring is done, don’t forget the video side of the setup — our walkthrough of how to connect a receiver to a TV covers HDMI ARC/eARC, which is the piece that actually gets sound from your TV apps back through the speakers you just wired up.

Ready to add more channels or more power? Compare current AV receivers before you buy.
Shop AV Receivers on AmazonFrequently Asked Questions
Does it matter which speaker wire is positive and which is negative?
Yes. Mismatched polarity between two speakers on the same stereo pair causes them to work against each other, thinning out bass and blurring the stereo image. Always match the marked or striped conductor to the same terminal (positive or negative) at both the receiver and the speaker.
Can I connect speakers to a receiver without banana plugs?
Absolutely. Bare wire works fine on both binding posts and spring clips — banana plugs are a convenience upgrade, not a requirement, though they do make future rewiring much faster.
What happens if I use the wrong wire gauge?
Undersized wire on a long run adds resistance, which can slightly reduce volume and dampen bass response on that channel. It generally won’t damage your equipment, but it will leave performance on the table, especially on runs beyond 50 feet.
Can I connect 4-ohm speakers to an 8-ohm receiver?
Many receivers can handle 4-ohm speakers safely, but not all — check your receiver’s specifications or manual for explicit 4-ohm support before wiring them up, since running unsupported low-impedance speakers can trigger overheating or a protection shutdown.
How do I know which terminal is front left versus surround right?
Every receiver’s back panel is labeled directly above or below each terminal pair (FL, FR, C, SL, SR, and so on). If the labels have worn off, the manual’s rear-panel diagram will show the exact layout for your model.
Do I need special wire for a subwoofer?
Most powered subwoofers connect via a standard RCA or LFE cable rather than speaker wire, since the subwoofer has its own built-in amplifier. Passive subwoofers are the exception and do use speaker-wire-style connections.
Can I run speaker wire through walls?
Yes, and it’s common for surround and rear channels — just use in-wall rated (CL2 or CL3) speaker wire, which meets fire-safety codes for that application, rather than standard exposed-use wire.
Why does one of my speakers sound quieter than the others after wiring?
This is almost always either a loose connection, a thinner wire gauge on that particular run, or a level that hasn’t been calibrated yet. Run the automatic calibration routine after confirming the physical connection is solid.
Is it safe to mix speaker brands on the same receiver?
Yes, speakers from different brands can share a receiver without issue as long as their impedance is compatible with your receiver’s supported range. Matching timbre between front and center speakers is a sonic preference, not a technical requirement.
What’s the difference between speaker wire and standard electrical wire?
Speaker wire is designed for low-voltage audio signal transfer and is typically stranded copper for flexibility, while electrical wire is rated for household AC current and different safety standards. They aren’t interchangeable.
How do I test if my speakers are wired correctly without a calibration microphone?
Play a mono source and listen from the center of the room. Correctly wired, in-phase speakers produce a tight, centered image; out-of-phase speakers produce a diffuse, directionless sound with weaker bass.
Can I connect more speakers than my receiver has channels for?
Not directly — each channel powers one speaker (or a matched pair in a parallel configuration on some receivers, which isn’t recommended without checking impedance handling first). If you need more zones, look for a receiver with dedicated multi-zone outputs instead.
Conclusion: Get It Right Once, Enjoy It for Years
Connecting speakers to a receiver isn’t complicated once you understand the two things that actually matter: polarity has to match at both ends of every run, and wire gauge has to suit the distance and power involved. Everything else — banana plugs versus bare wire, binding posts versus spring clips — is a matter of convenience rather than correctness. Take the extra ten minutes to label your runs, test each channel individually, and run your receiver’s calibration routine afterward, and you’ll have a system that sounds exactly as good as the gear behind it, with no buzzing, no phase cancellation, and no mystery quiet channel to chase down later.
If you’re still finalizing the rest of the setup, our guides on setting up a home theater receiver and connecting a receiver to your TV are the natural next steps.

Grab a complete wiring kit — wire, banana plugs, and a stripper — and finish the job in one trip.
Shop Wiring Kits on Amazon
Pingback: Best Yamaha Receivers: Top Picks
Pingback: Onkyo Receiver Review: Breakdown of Every Current Model